Introduction
Experience the power of Heex’s Smart-Data platform! This quick start guide will have you creating your first scenario-driven data collection event in just a few easy steps. Learn how to leverage Agents deployed on your Systems (robots, drones, etc.), to monitor data streams and automatically trigger recordings based on predefined conditions (Triggers). You’ll configure Recorders to capture specific Signals, generating tagged Events that encapsulate key moments and data insights. To make the most of this tutorial, we highly recommend reviewing the Key Concepts, including Smart-Data, Agents, Triggers, Recorders, and the overall architecture. Heex is compatible with Ubuntu, and works great in virtual machines and Docker environments (including WSL).Configure your system
1
Create your first system
The first step is to create a system. Here is how to do it.
📝 Note: Click on the blinking blue dot at each step of the interactive images to explore the application and see how it all comes together.
2
Create a Data Source in the created system
Now that you’ve created your system, you should add a Data Source, to describe what signals you can monitor and record on your system.
3
Create trigger
The next step is to create a trigger, with condition on signals you’ve just created.
4
Request implementation
Now, you can request necessary implementation for the Heex Agent to work and read your systems’ signal. Here, it is fake signals.
Configure your sdk
Setting Up Your Heex Environment
Get an API key to download and use the cli
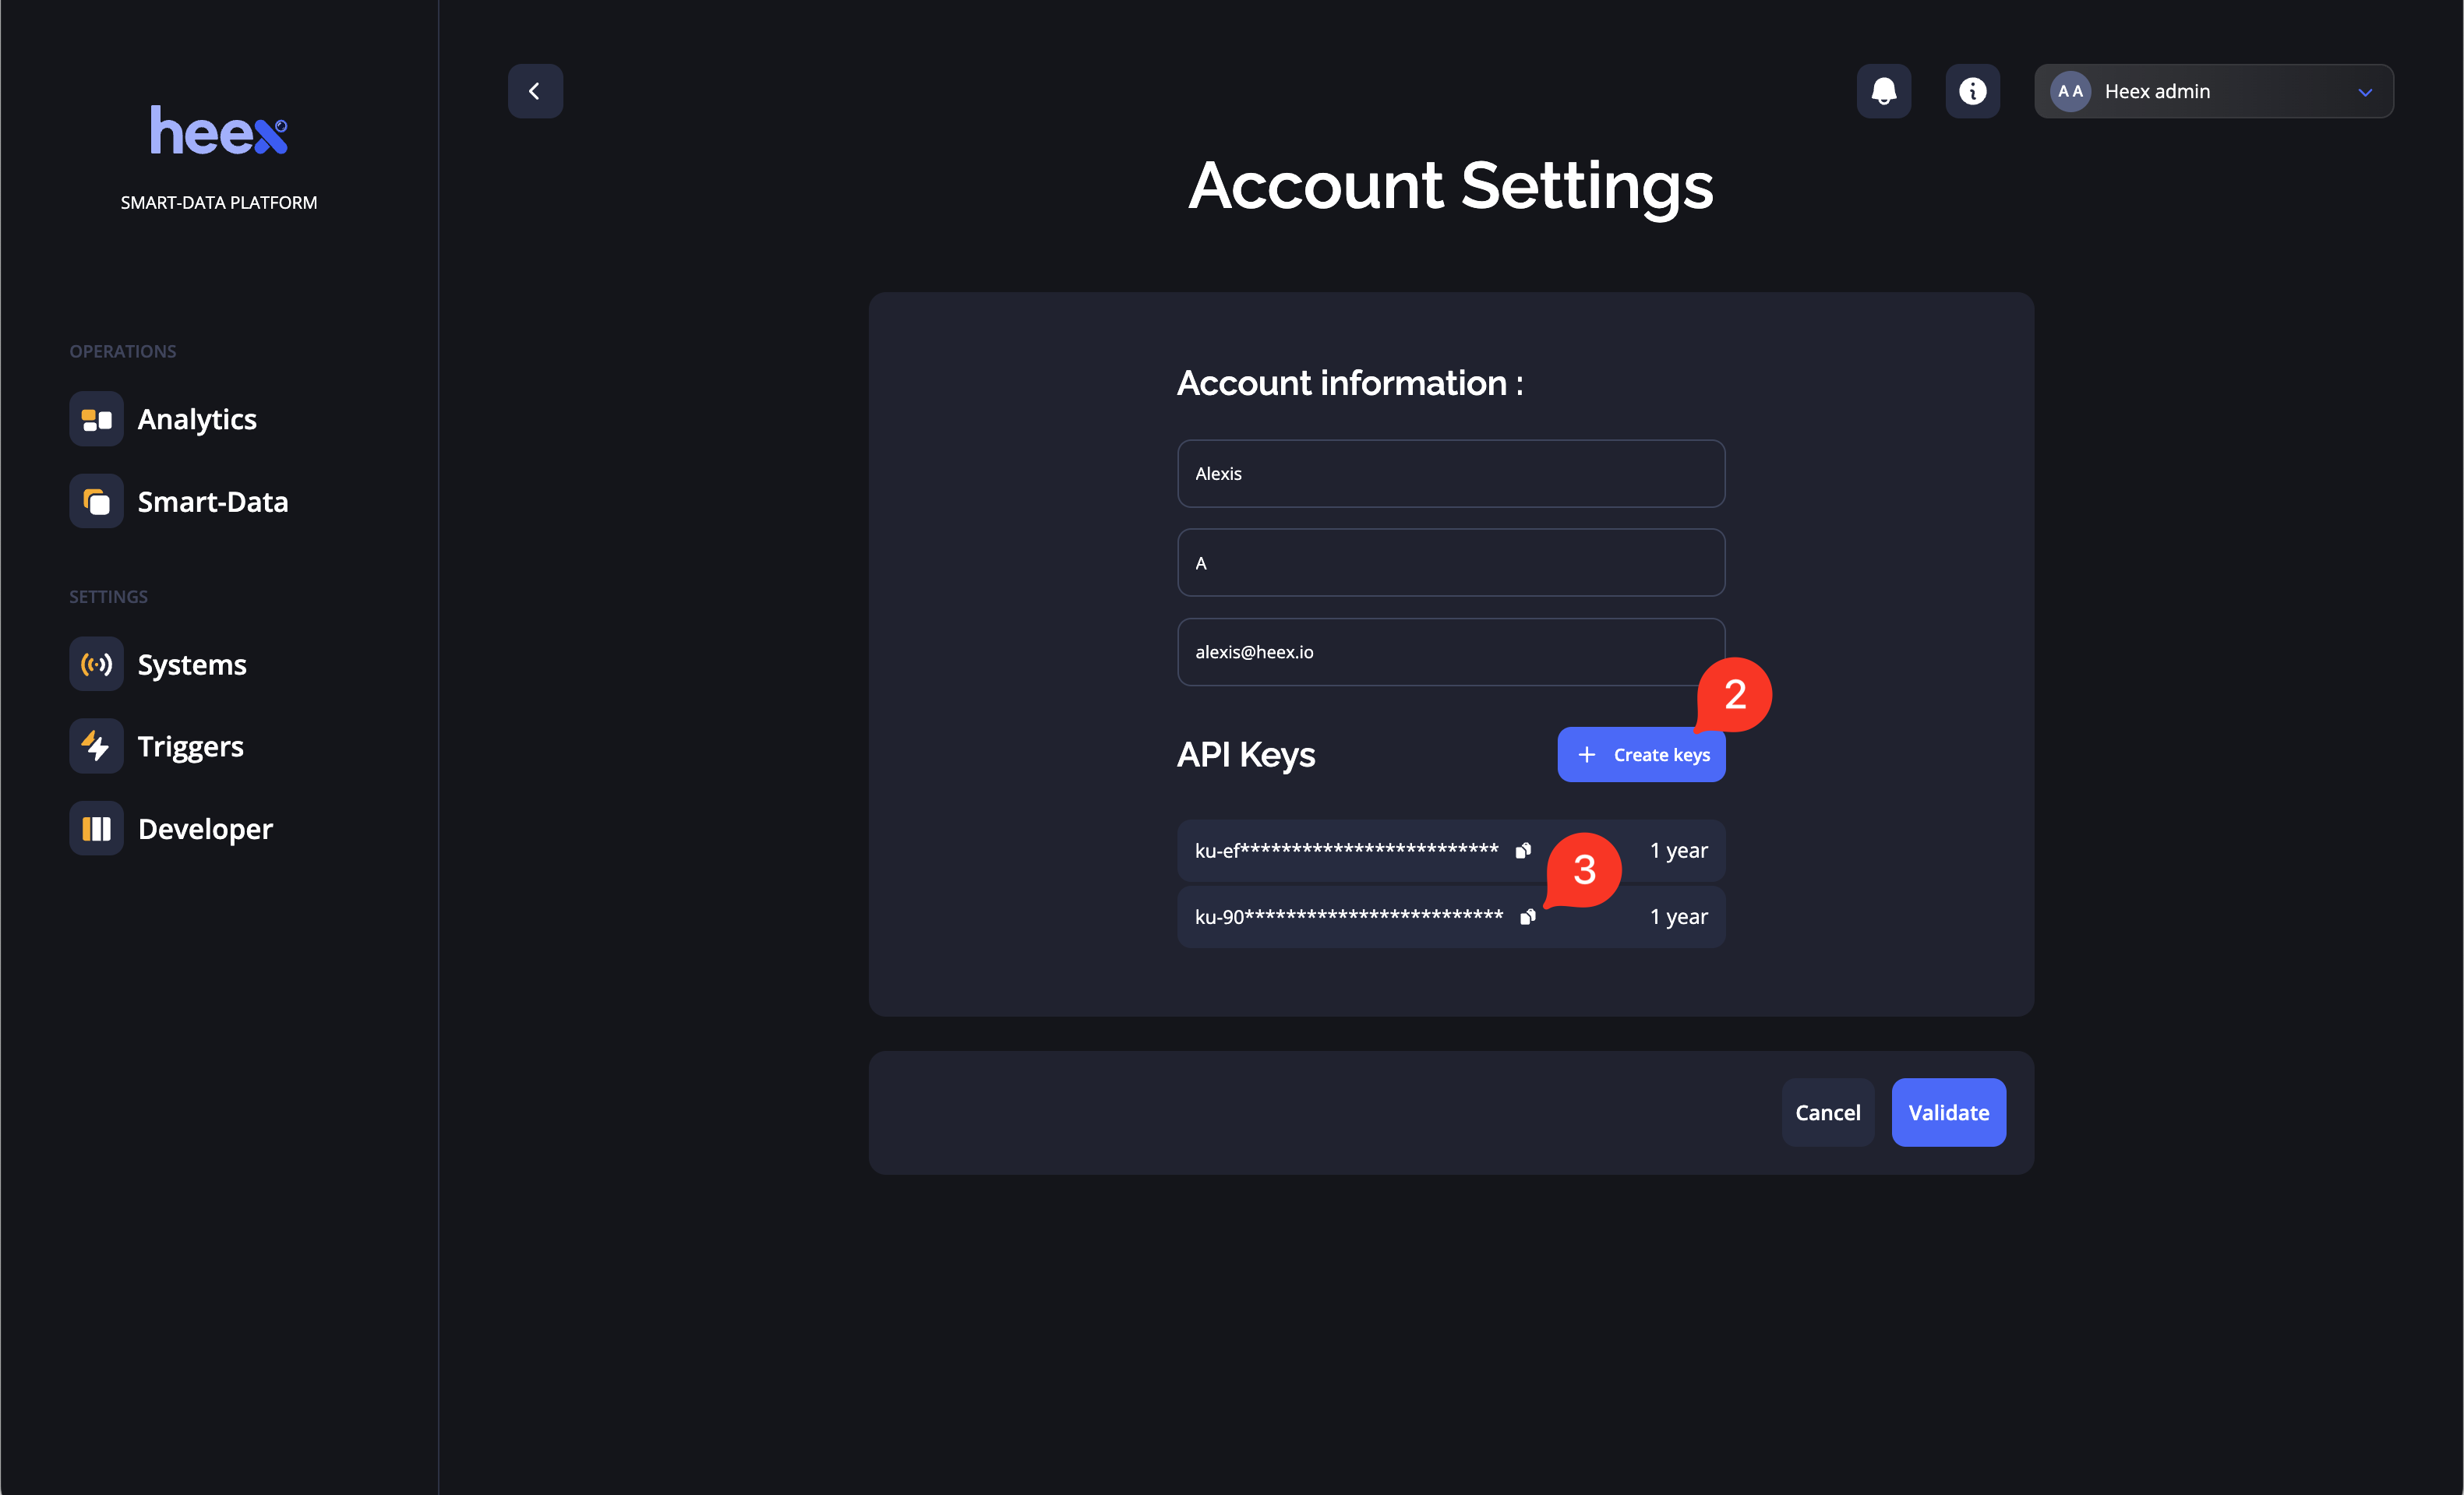
- Go to Account settings
- Create an API key
- You can now copy it
Get the Heex CLI
- Download the CLI with the following command:
- Now you can use the CLI with the
./heexcommand.
Get the Heex SDK
Download the Heex SDK with the following command:Generate your first event
Code implementations
- Python
- C++
Go to getStarted Python directory.Create monitor
- Open the Monitor source file.
- Replace the
monitorUuid(monitor_uuidin python) variable with the implementation ID of your monitor.
- Open the recorder source file.
- Replace the
recorder_uuidvariable with the implementation ID you get on the cloud for the recorder. - Add a label: In the
generateRequestedLabelsfunction add as many labels as you want as shown by the example. - Add a recording: Create a recording sample by using
echo "This is Smart Data!" > file.txt. Provide the path of this file in thegenerateRequestedFilePathsfunction (filepath = "/path/get-started/python/file.txt").
Launch the Heex Agent
- Put all your implementations inside the
~/Heex_SDK_<version>/implementationsfolder. - Set up your system:
- Launch Heex: