Introduction
This quick start guide lets you test Heex with a fully automated workflow. You’ll transform your computer into a simulated robot with Heex running on it, no actual robot required! You’ll install the Heex Agent on your Ubuntu system (or VM), connect to a pre-configured “AMR - Sample Mobile Robot” in your workspace, and generate events by controlling a simulated speed signal. When the speed exceeds the threshold set in the “High Speed” trigger, Heex captures the relevant data. This hands-on experience demonstrates how Heex captures Smart-Data when specific conditions are met, just as it would on a real robotic system in production. By adjusting the simulated robot’s speed, you’ll trigger events when crossing predefined thresholds. Heex will automatically capture the relevant data, allowing you to explore the full Smart-Data workflow from event generation to data visualization.Prerequisites
- Ubuntu OS (20.04, 22.04, or 24.04)
-
If you don’t have Ubuntu, you can use Multipass to create a virtual Ubuntu environment with ROS2 Jazzy pre-installed (ROS2 is not needed for this quick start but can be useful for other Heex features):
Set up Your Environment
Get Your API Key
You’ll need an API key to authenticate with Heex: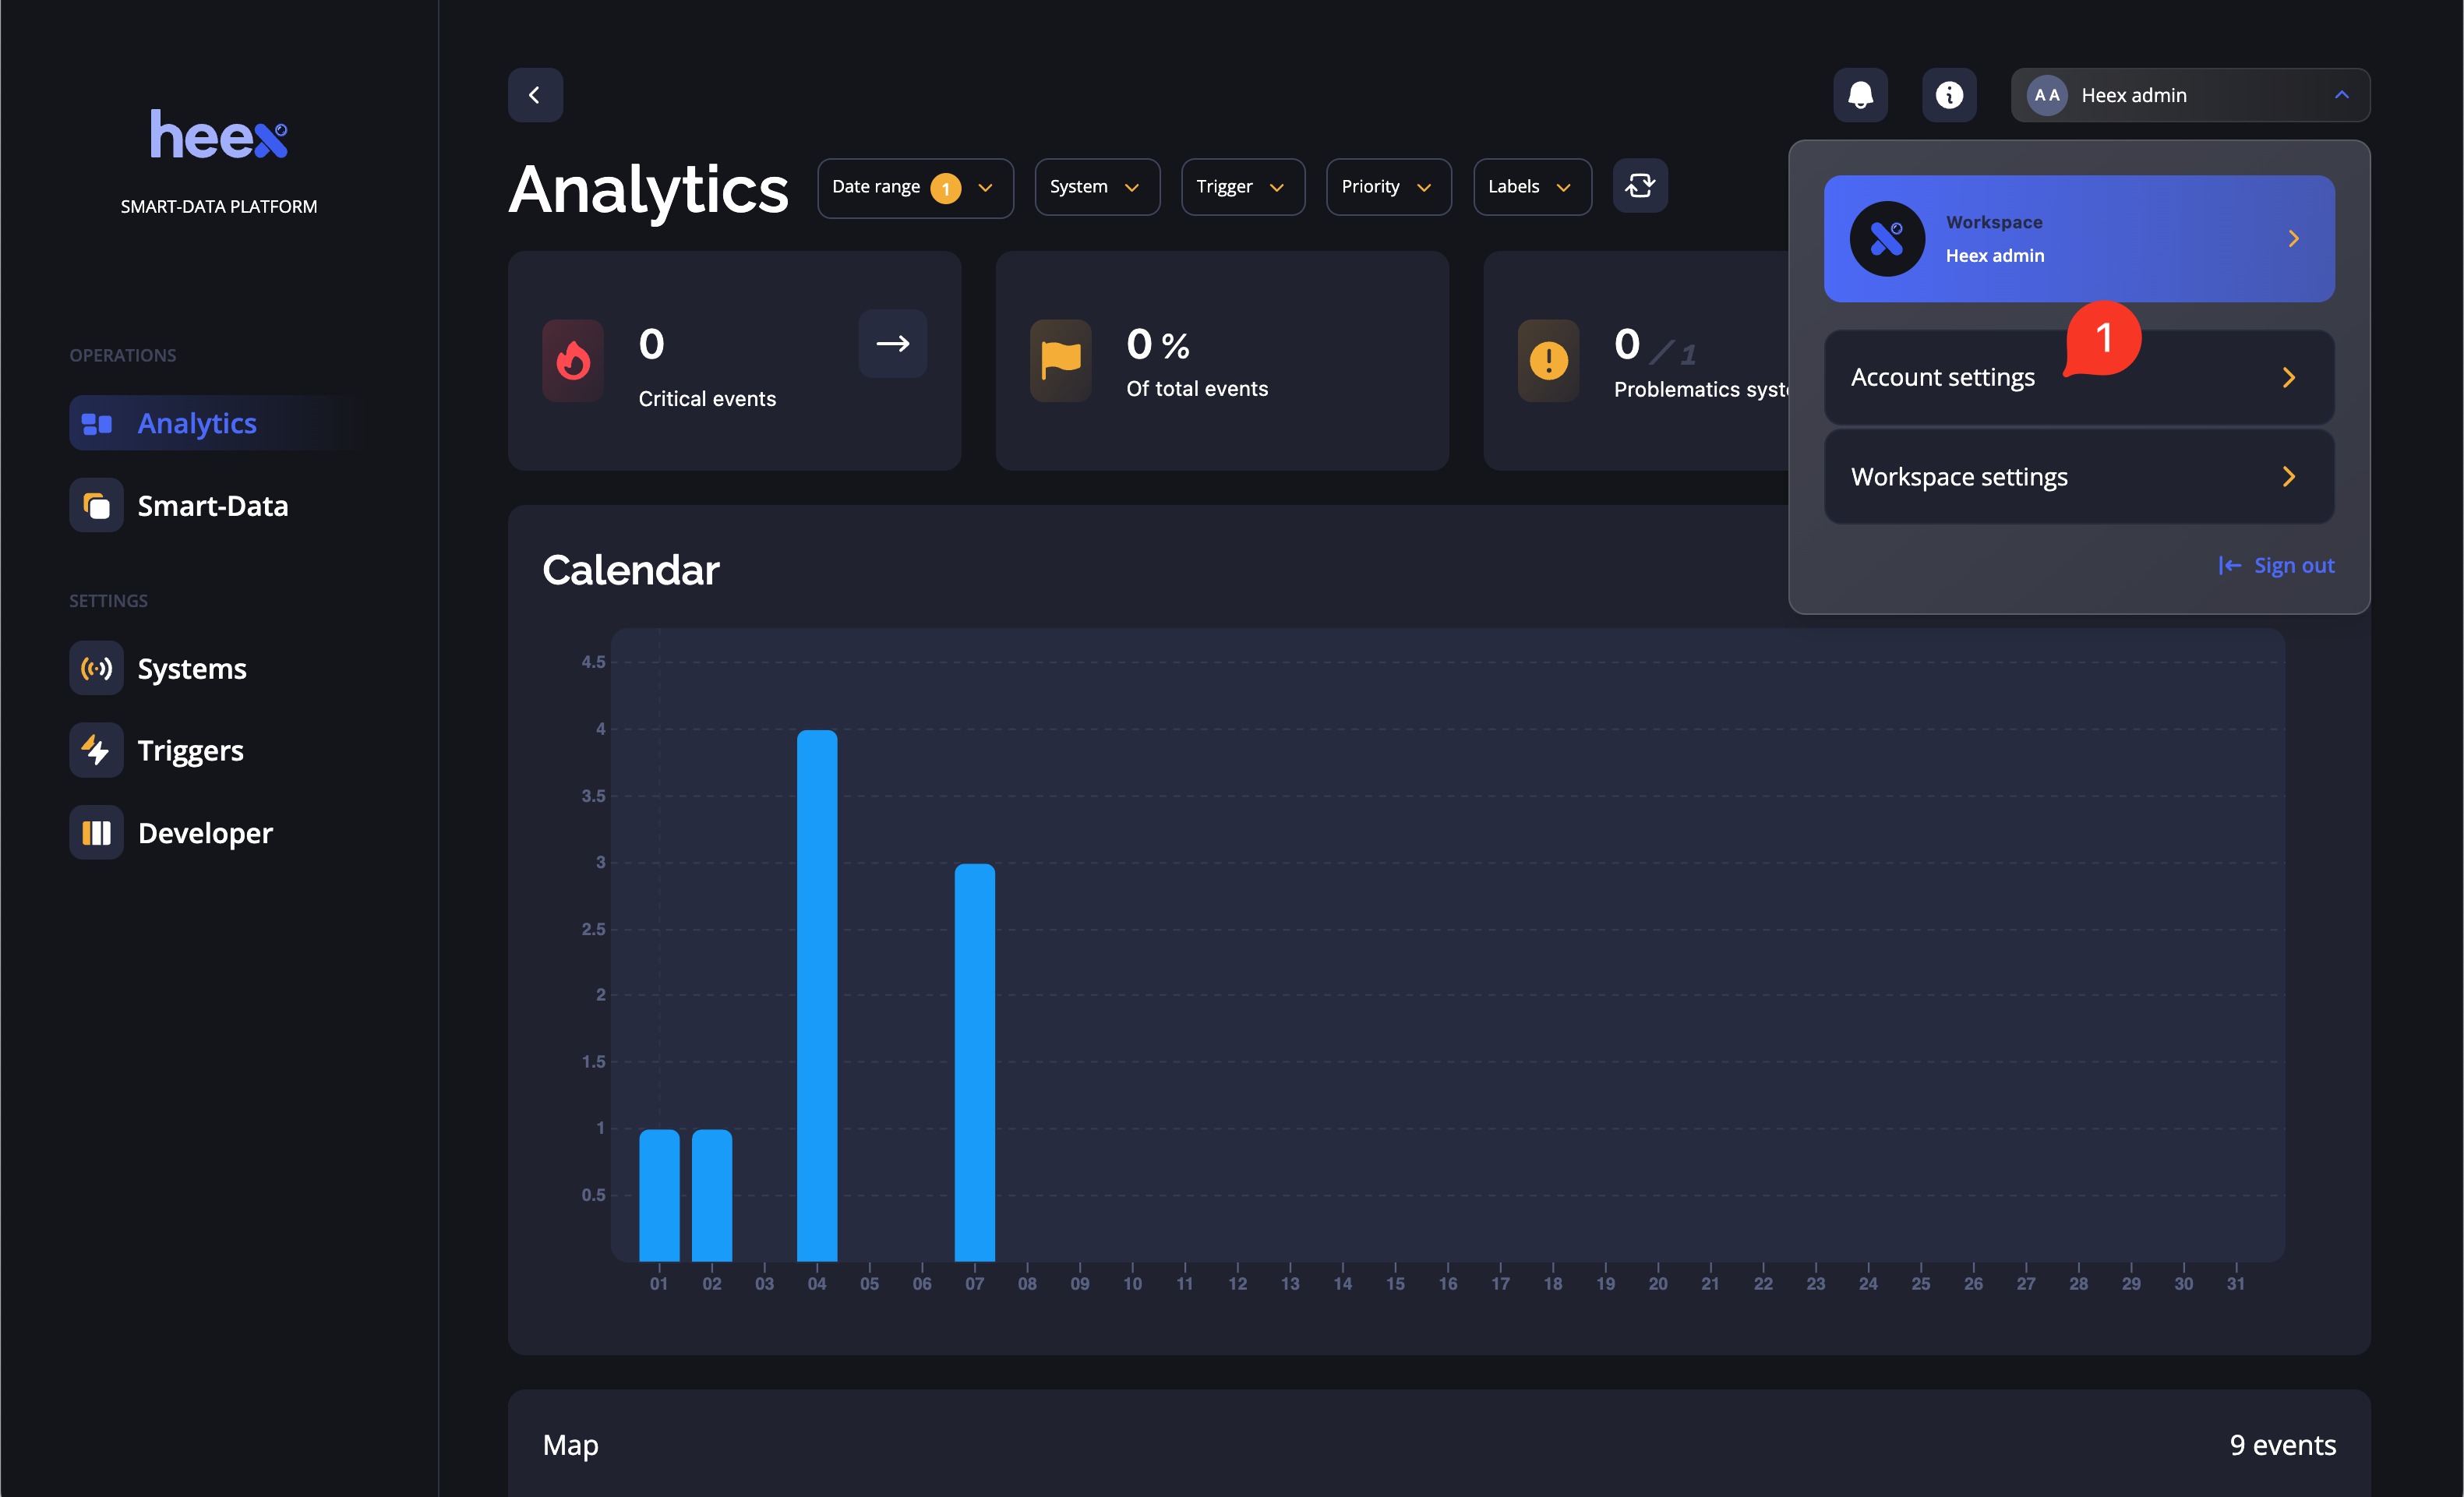
- Go to Account settings
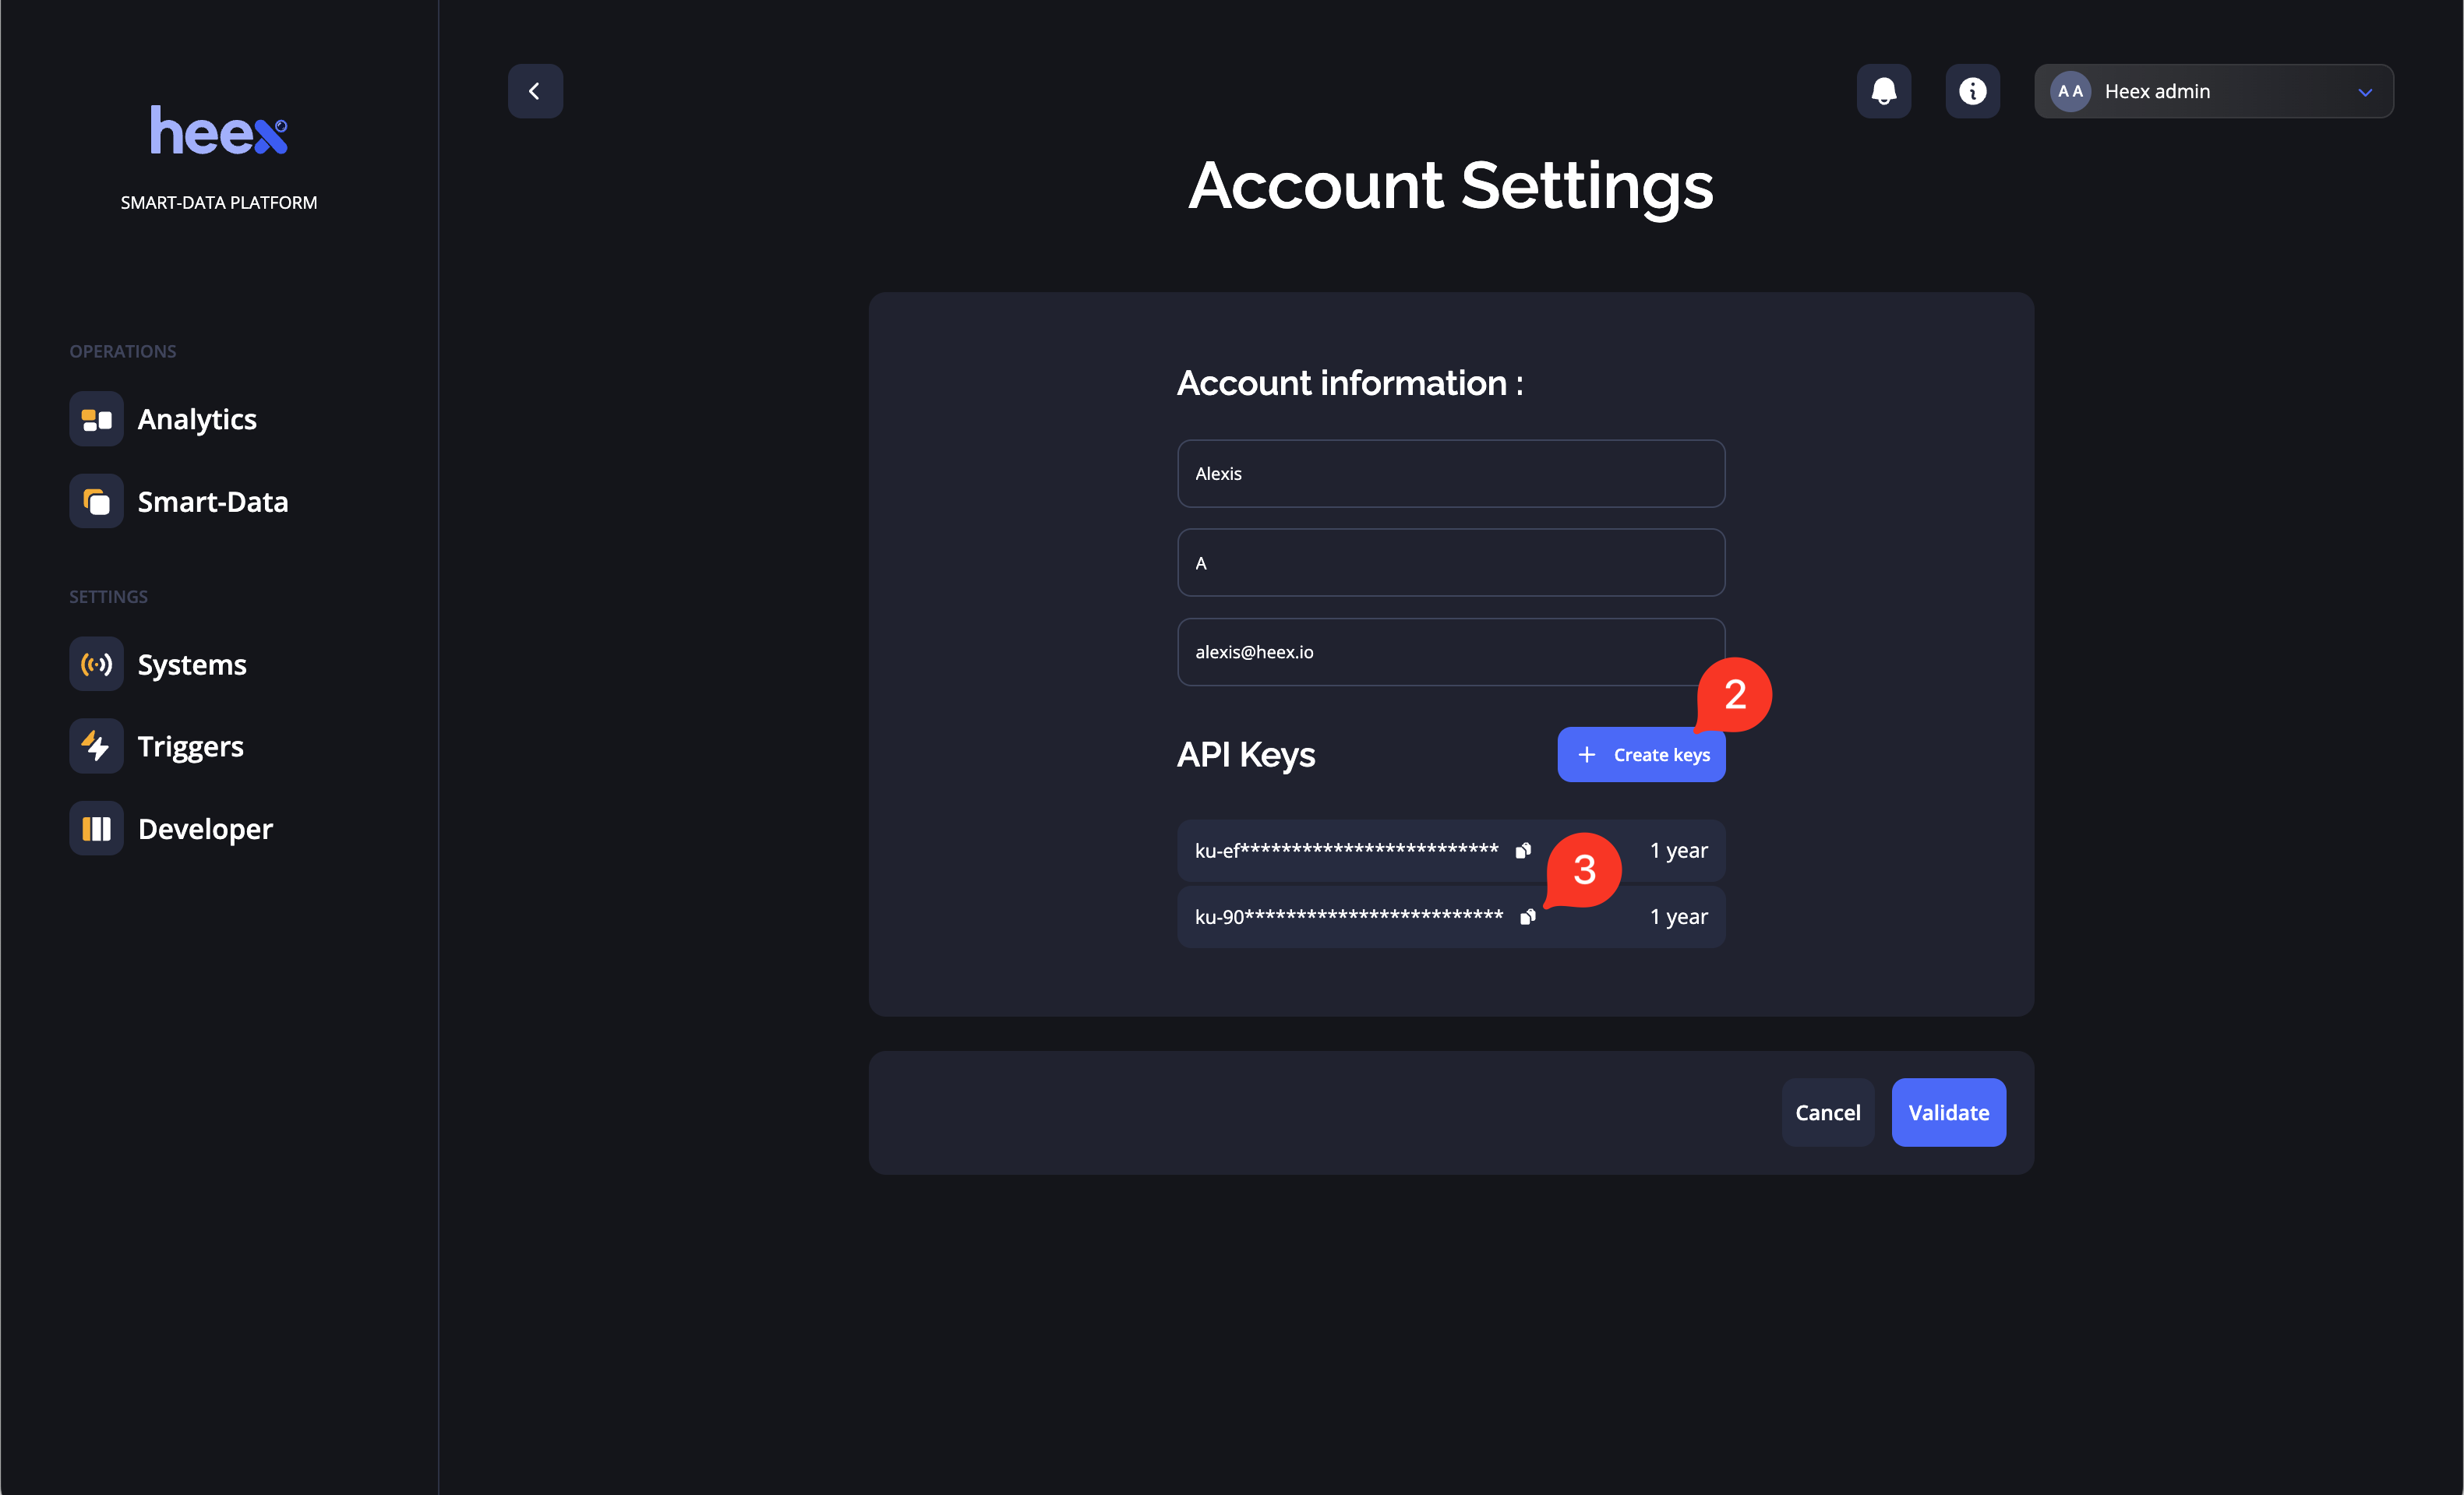
- Create an API key
- Copy your API key for use in the next step
Download and Run the Setup Script
- Download the script:
- Run the script with your API key:
- Download dependencies (
heex-installer, utility scripts, implementations) - Install the Heex installer
- Set up and start the Heex Agent connected to the “AMR - Sample Mobile Robot” system
- Launch a speed signal controller you can manipulate
ℹ️ Important: If the “AMR - Sample Mobile Robot” system is not available, you can create it using the commandheex system create-AMR-systemand then run the script again. Note that you will have to install theheexCLI first if you have not already done that.
Generate your first events using the Speed Controller
With Graphical Interface
If you’re running Ubuntu with a GUI, a window will appear showing:- A graph plotting the speed value
- A red threshold line
- A slider to control the speed
Without Graphical Interface
If you’re using a terminal-only environment:- A text-based speed plot will appear in your terminal
- Use your keyboard arrow keys (up/down) to control the speed
- Each time the speed crosses above the threshold, an event is generated
View Your Events
- Return to the Heex web application
- Navigate to the Smart-Data page
- You should see your newly generated events
Explore Event Details
- Click on any of your newly generated events to open the event details column
- Examine the event information:
- Timestamp when the event occurred
- System that generated it (AMR — Sample Mobile Robot)
- Trigger that activated the event
- Labels providing additional context
- And more
- At the bottom of the event column, find the Recordings table
- Click the Play button on the MCAP recording to open Heex Studio
- Customize your view by:
- Creating a plot panel
- Selecting the speed signal to visualize
- Optionally, you may plot the Acceleration and the Wheel Turn signals
- Exploring how the speed change triggered the event
Next Steps
Now that you’ve experienced the basics of Heex Smart-Data:- Try creating your own trigger
- Learn about implementations
- Explore the Analytics features to gain insights from your events