Concepts & Architecture
Conditions
By default, all conditions must be met simultaneously for a trigger to generate an event (implicit AND logic). For example: speed > 20 km/h AND acceleration > 1 m.s-². For advanced use cases, you can combine conditions using logical expressions with operators like OR, XOR, NOT, and more. See Logical Expressions below. Conditions can be applied on different signal types:- Number
- String
- Maps
- Boolean
- Custom text for specific types
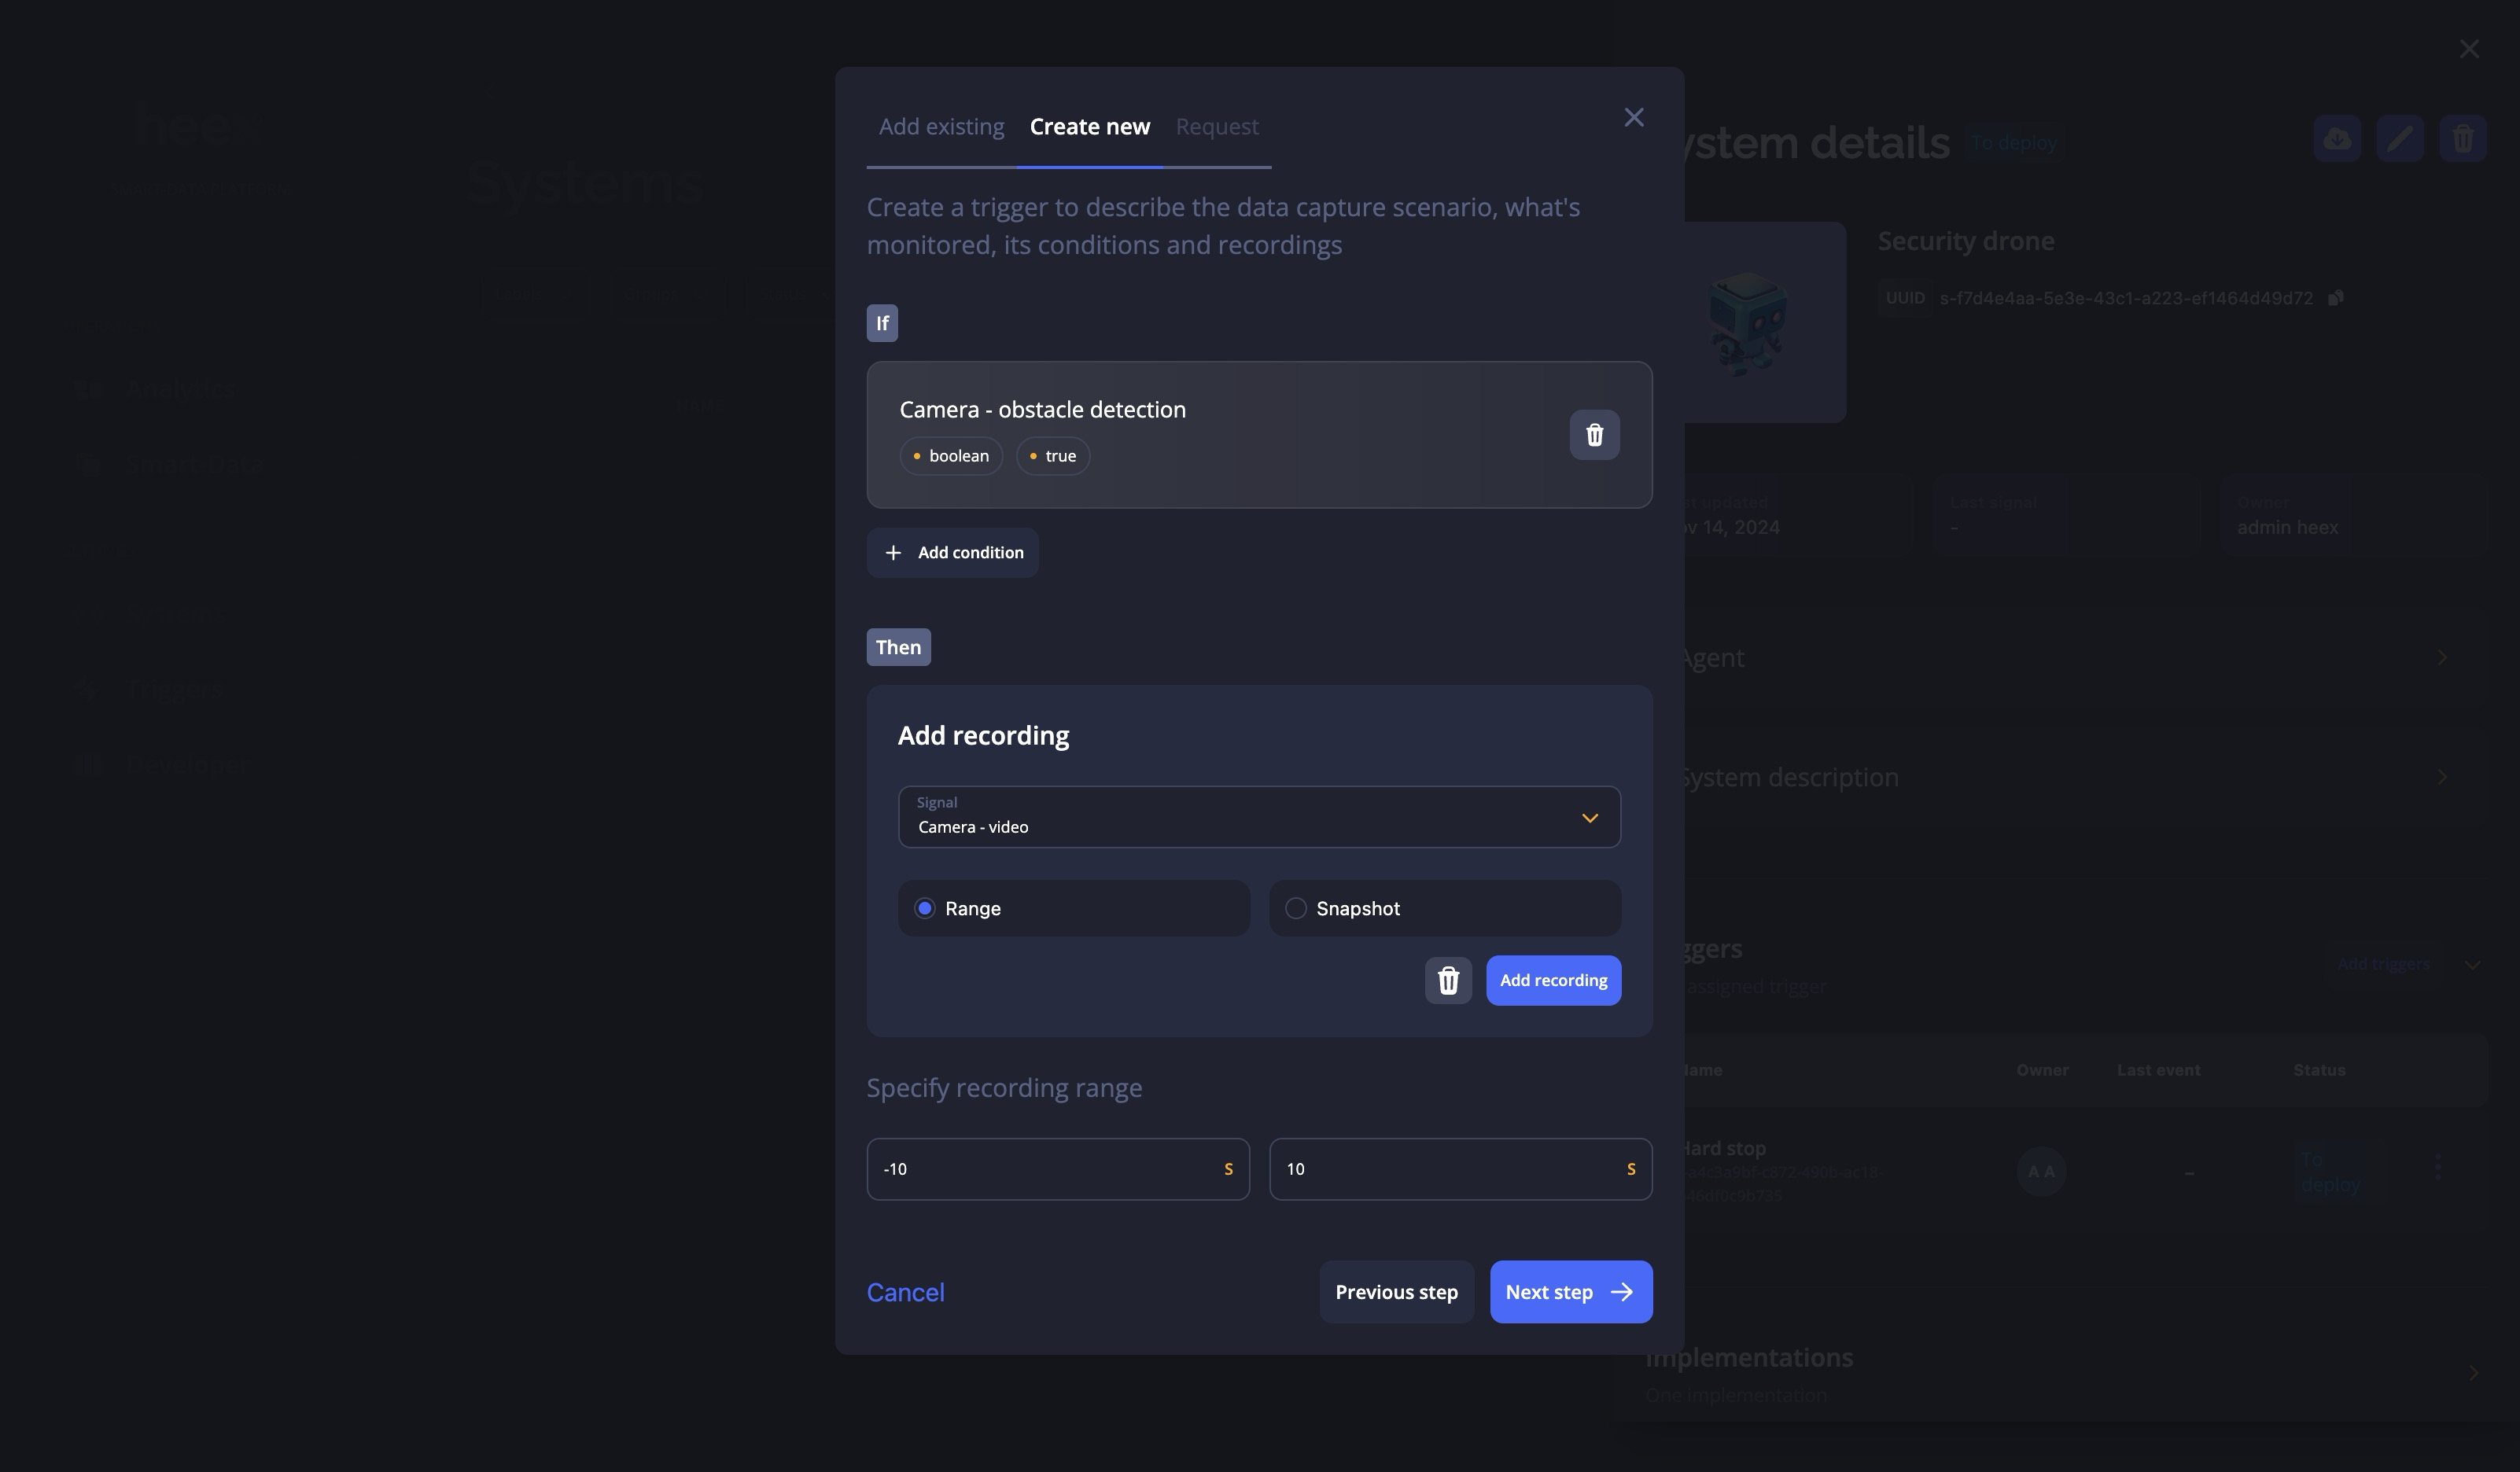
Recordings
Recordings are the data you want to capture when a trigger conditions are met. Such recording can be point in time or of a defined duration. The time range can start before the trigger fires and creates an event thanks to a buffer.Trigger Management
Triggers Overview
Trigger List

- ID or name
- Systems using the trigger
- Trigger Labels
- Trigger Priority
Trigger List on a System
You can list all triggers applied to a system from its system view. Each entry has an action menu with the following options:- View the trigger
- Unlink the trigger from the system
- Remove the trigger
Viewing the Trigger
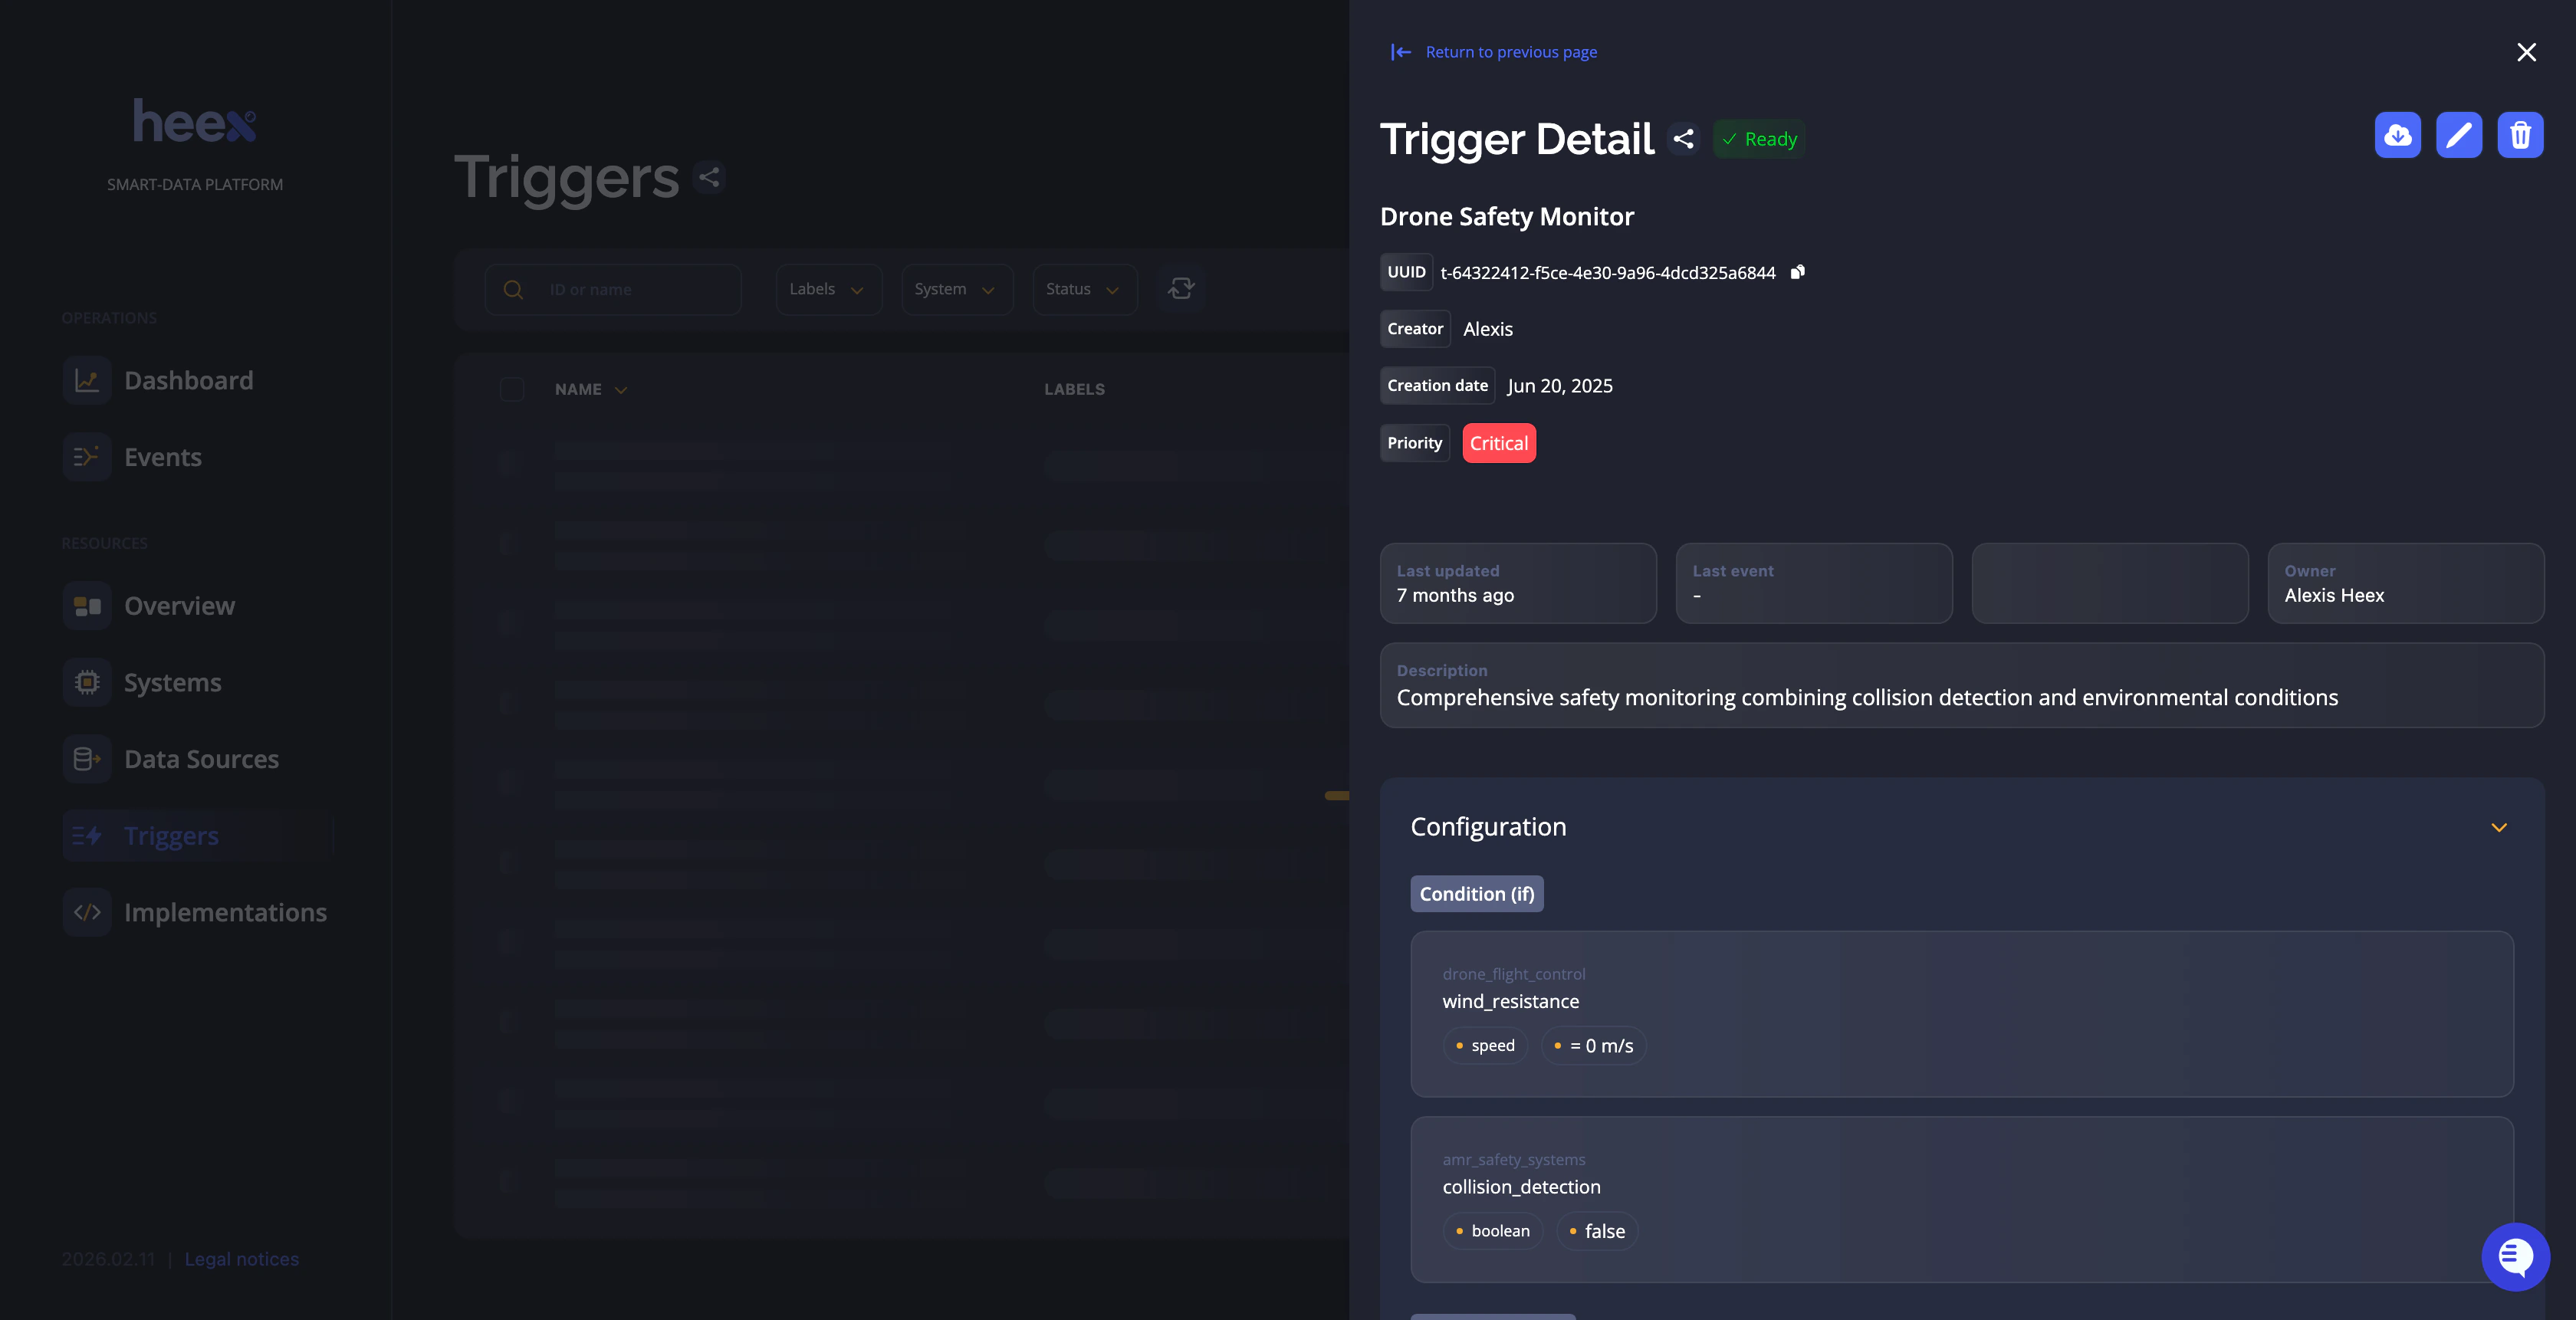
Main Information
- Name
- UUID
- Priority
- Status
- Labels
General Information
Provides details such as the total number of events generated, or the date of the latest event.Configuration
The configuration block details the monitored signals, conditions and which signals are to be recorded and for how long.Specific Options
This block displays additional settings for your trigger, such as the recording range (i.e. the duration) of your recordings.Systems
Lists all systems using the trigger.Creating Triggers
You can create a trigger from two places:- From the Trigger page: Create a trigger independently, without being tied to a specific system. You can then add it to one or multiple systems later.
- From a System: Create a trigger directly within a system context. In this case, you can only use signals from the Data Sources linked to that system.
Main Information
You need to enter essential information such as the name, description, and labels for the trigger.Configuration
In this step, you define what your trigger will do: what will activate it and what recordings will be generated when it activates.Conditions
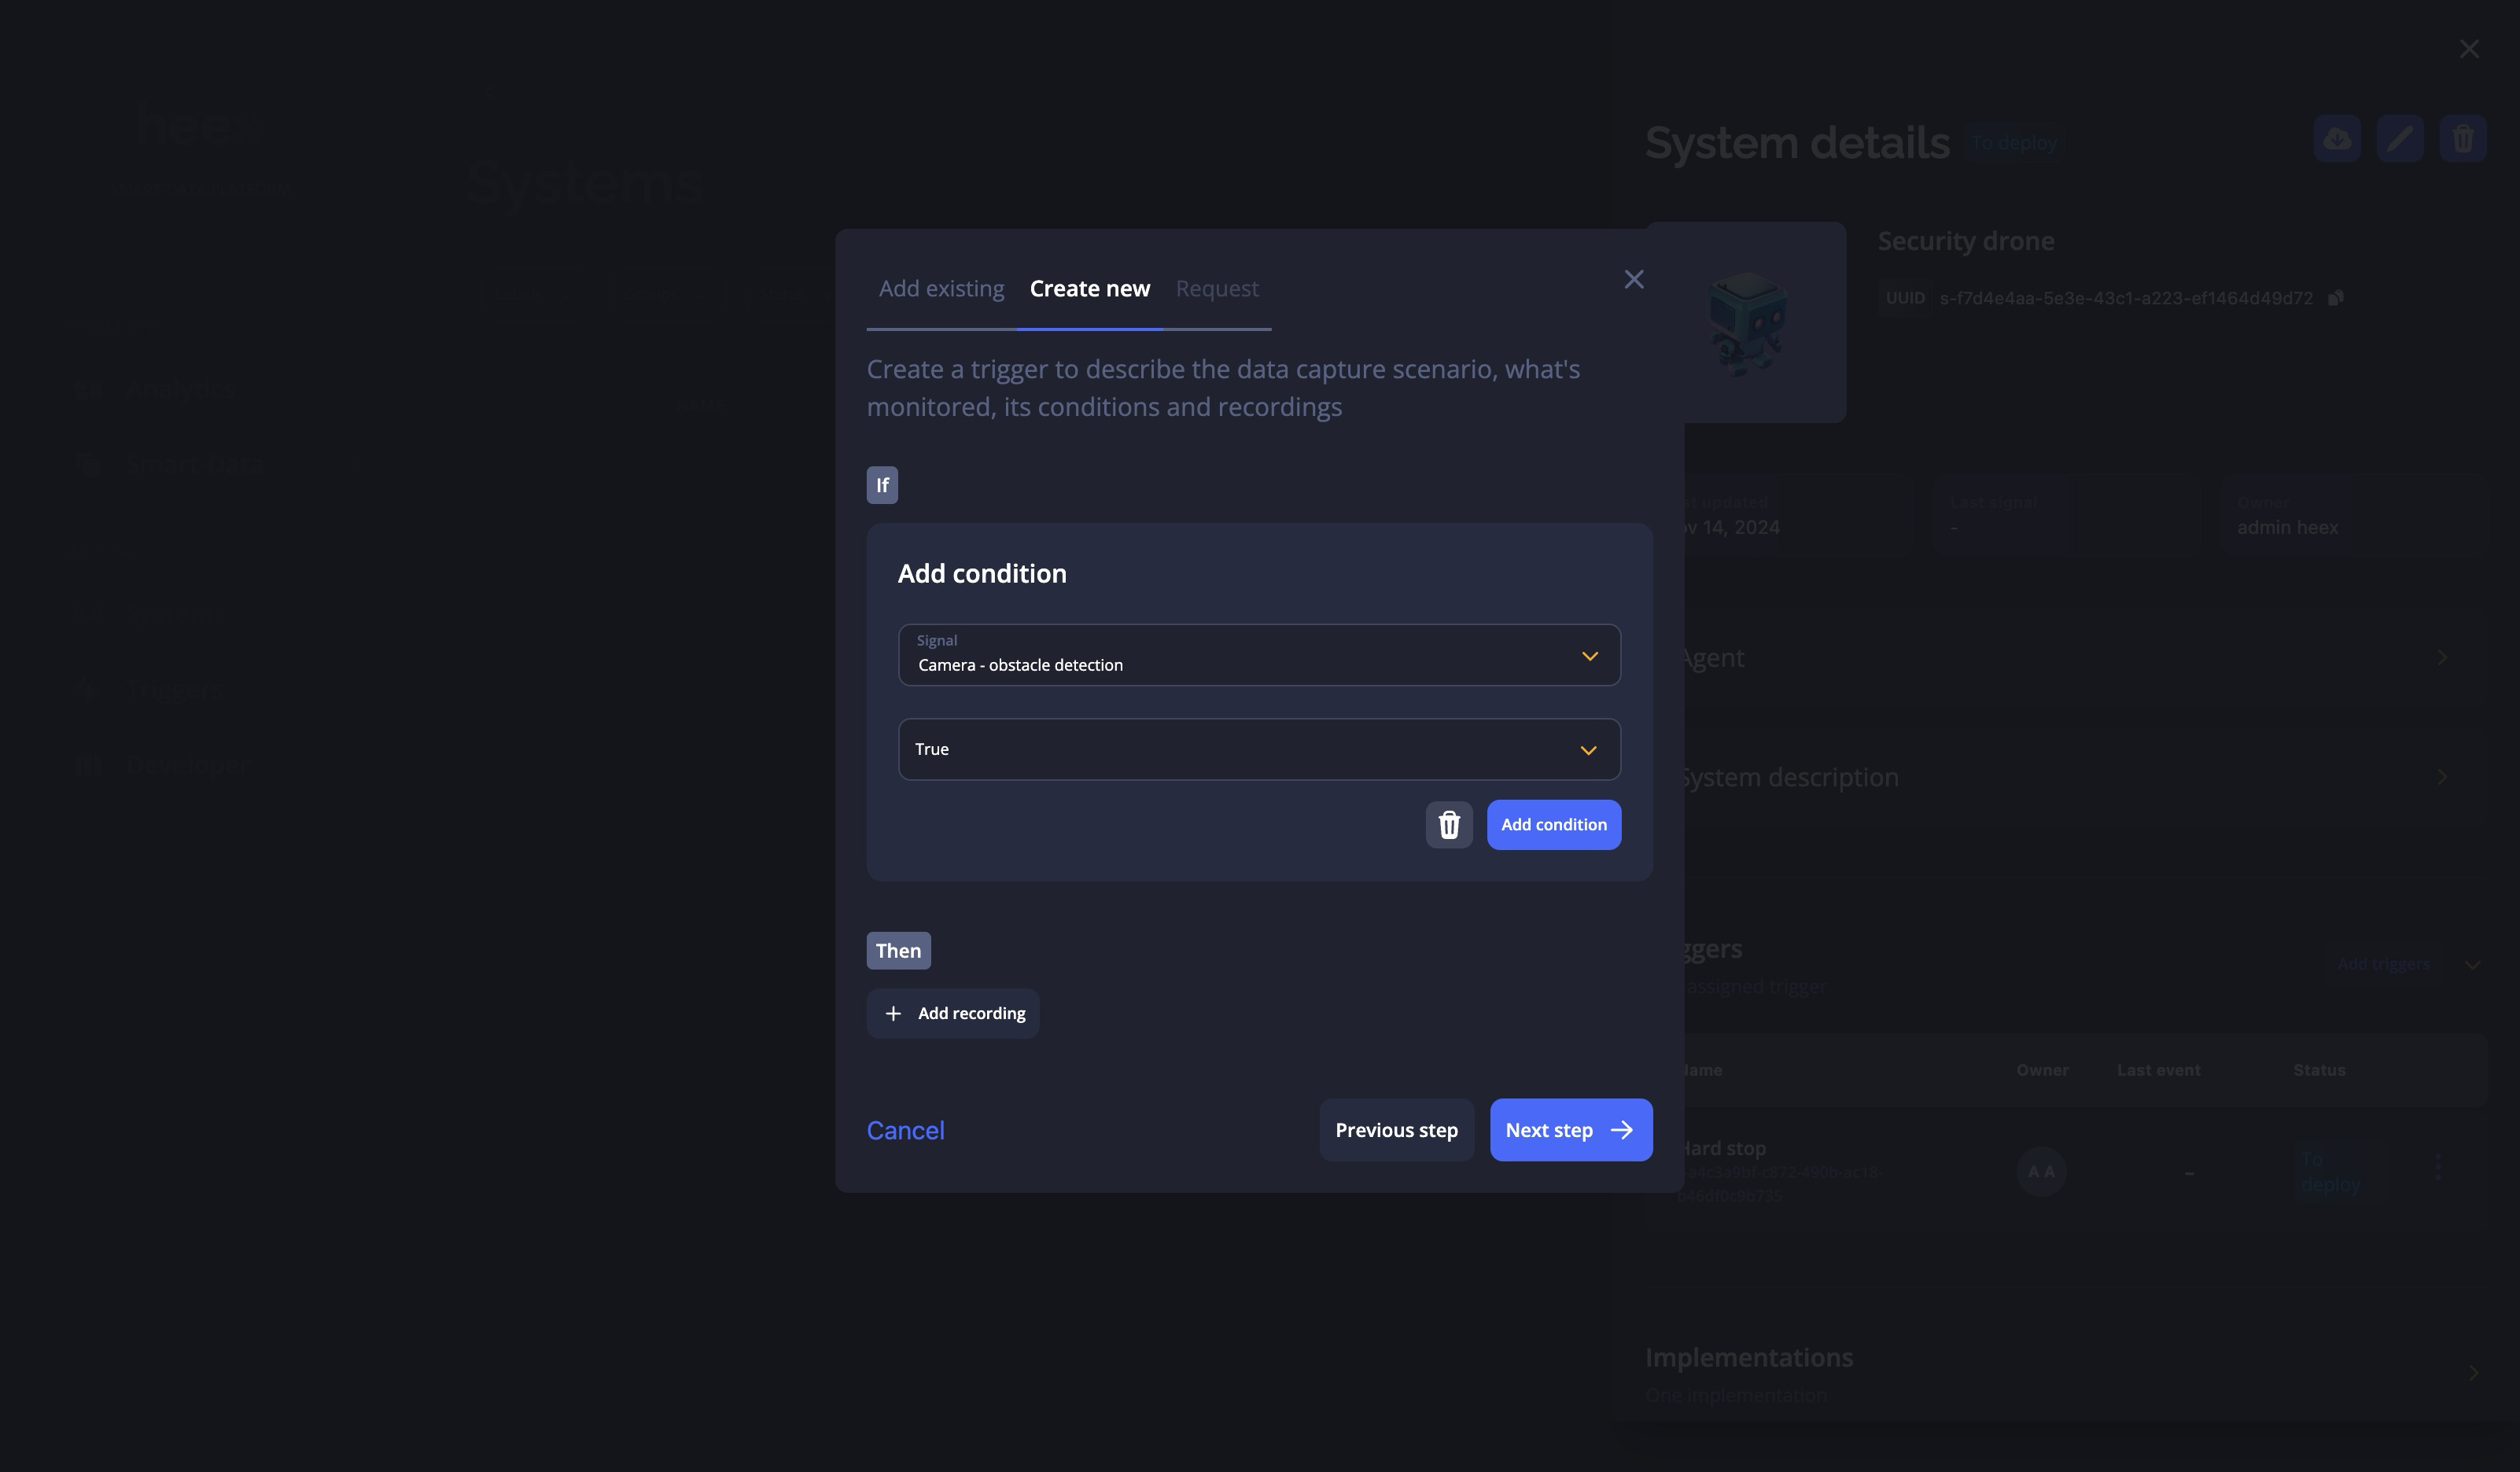
- Number: Select an operator and provide a number.
- String: Select an operator and provide a string.
- Maps: Select an operator and multiple zones.
- Boolean: Specify whether the signal must be true or false to meet the condition.
- Custom: Provide free multiline text.
Recordings
Specific Options
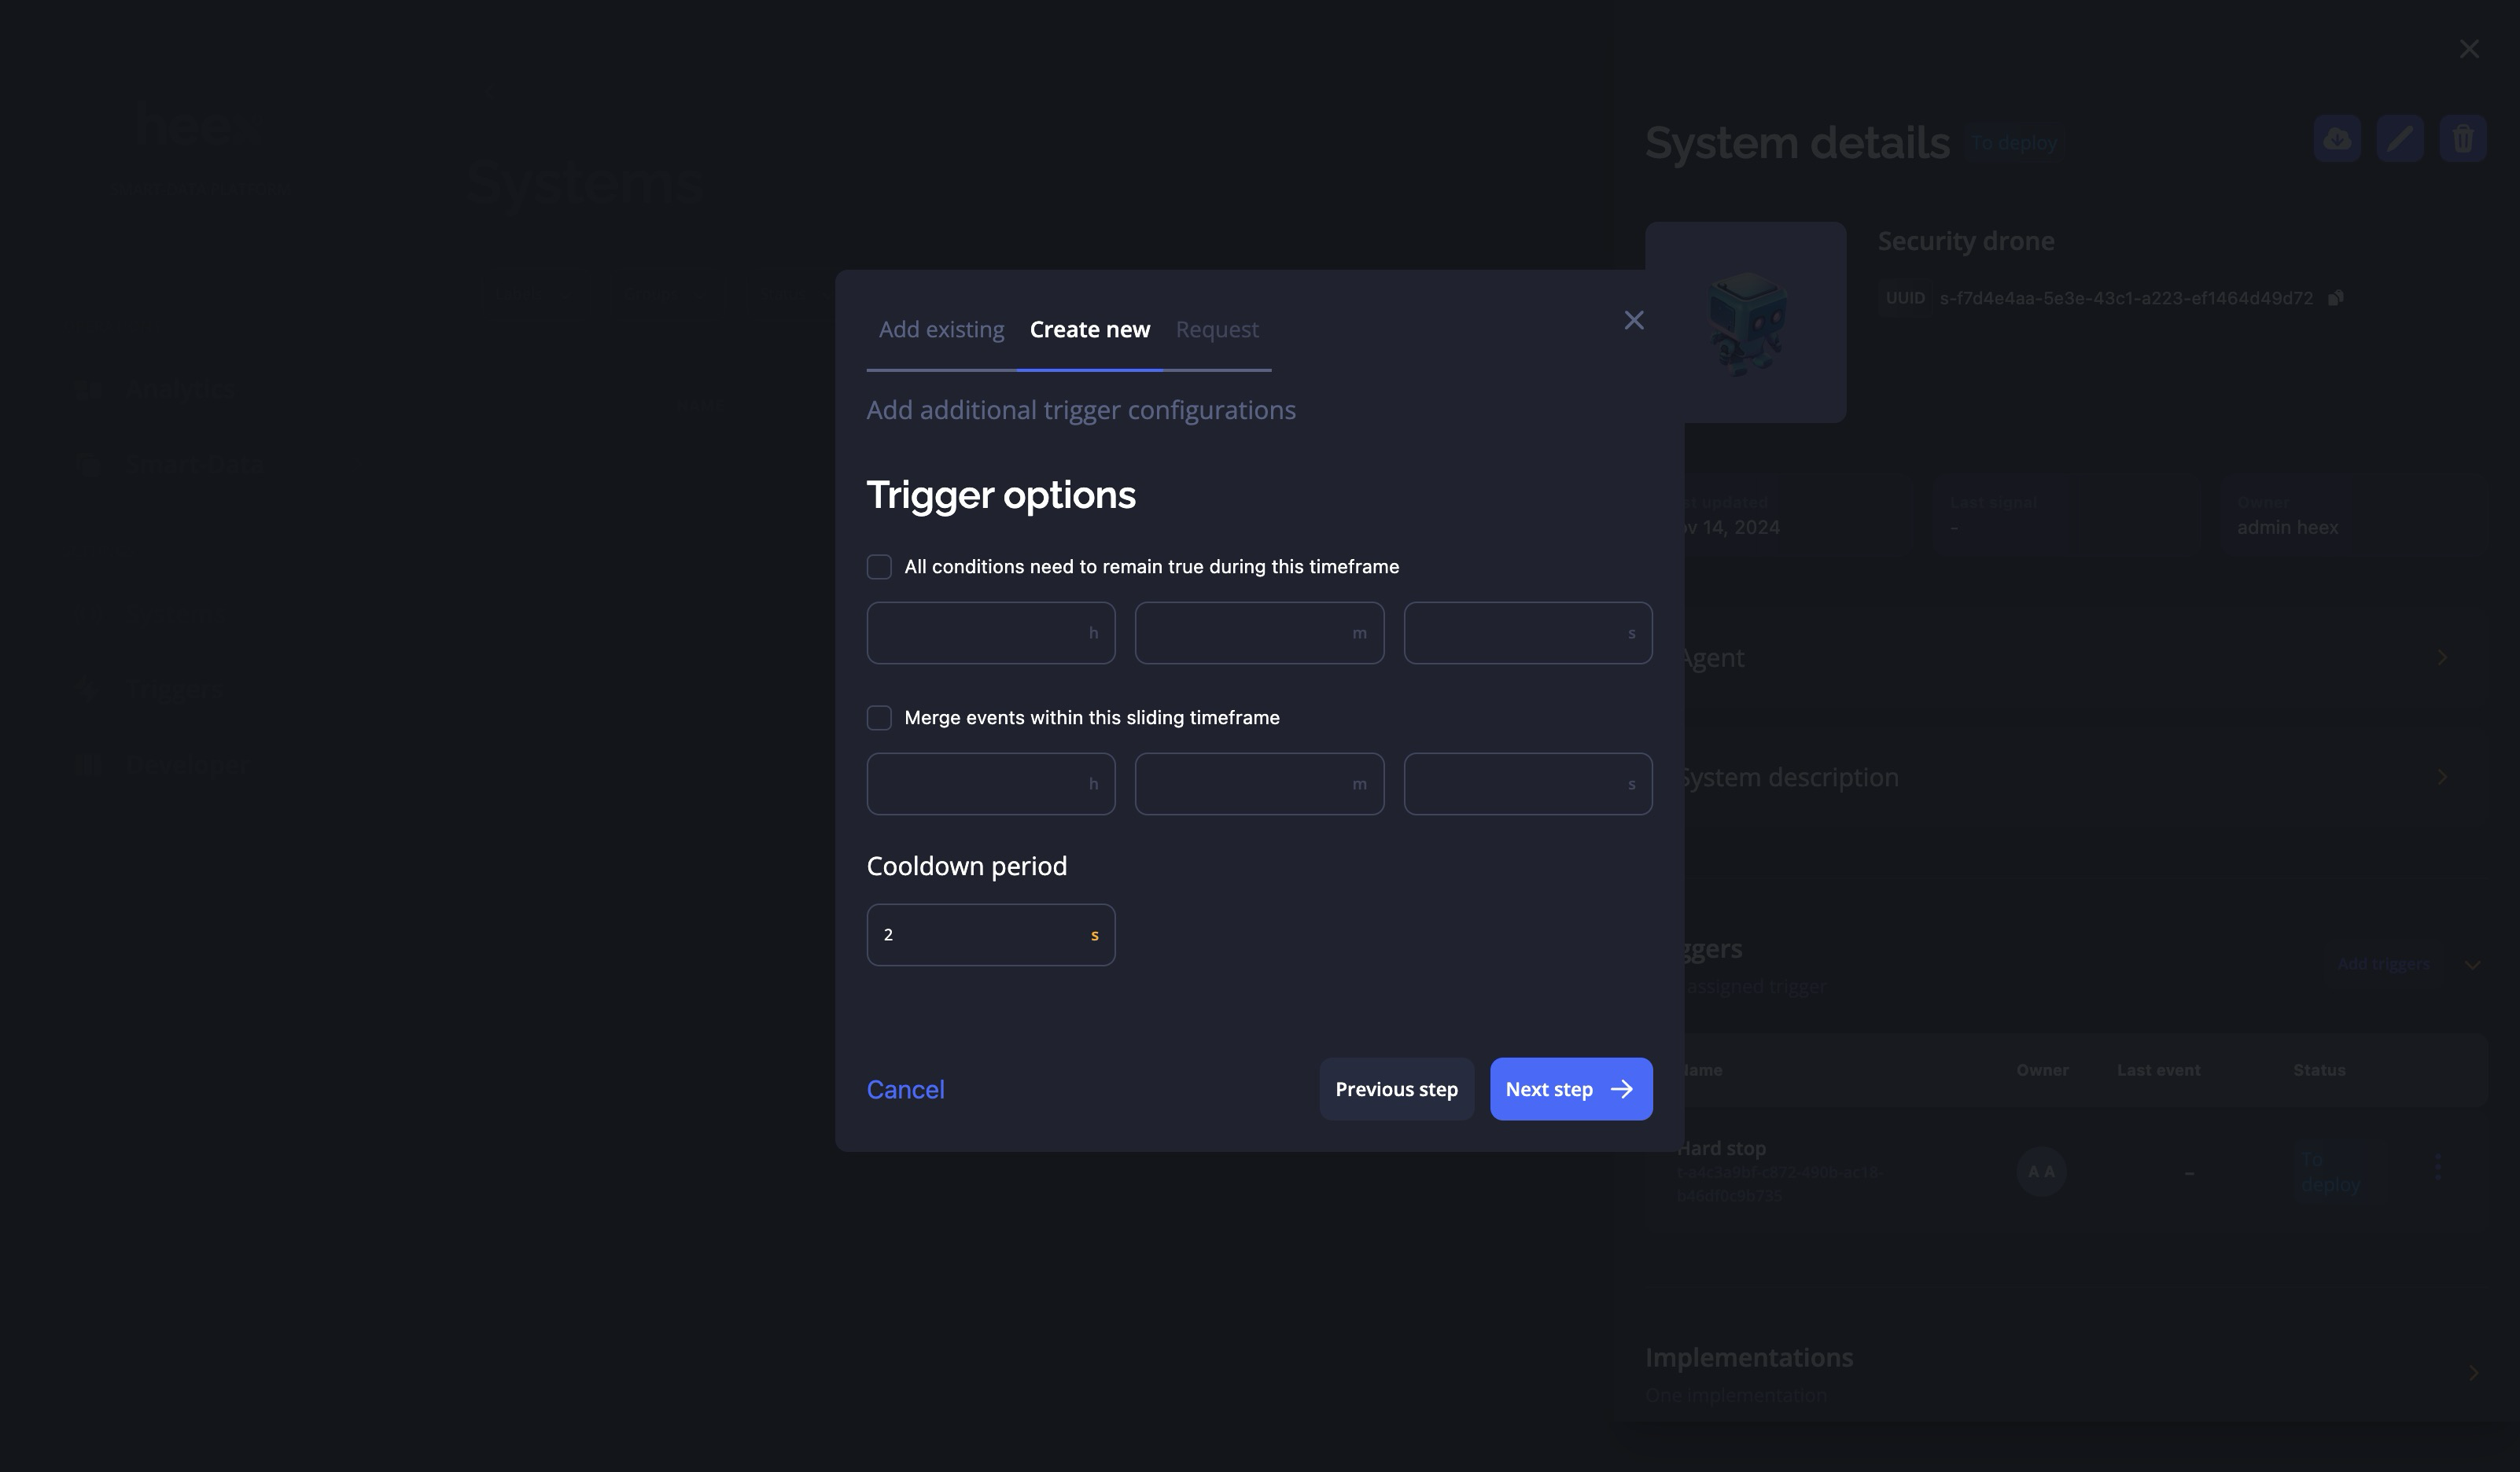
- Conditions must remain true for a timeframe: The trigger will only activate if all conditions are true simultaneously for the specified timeframe.
- Merge events within a sliding timeframe: This option merges events generated by a trigger when a new event is generated within the specified timeframe of the last merged event. The timeframe resets with each new event, and the merged event is finalized when no new events are generated within the specified timeframe.
- Cooldown period: Specifies a time period during which the trigger will not generate new events after generating one.
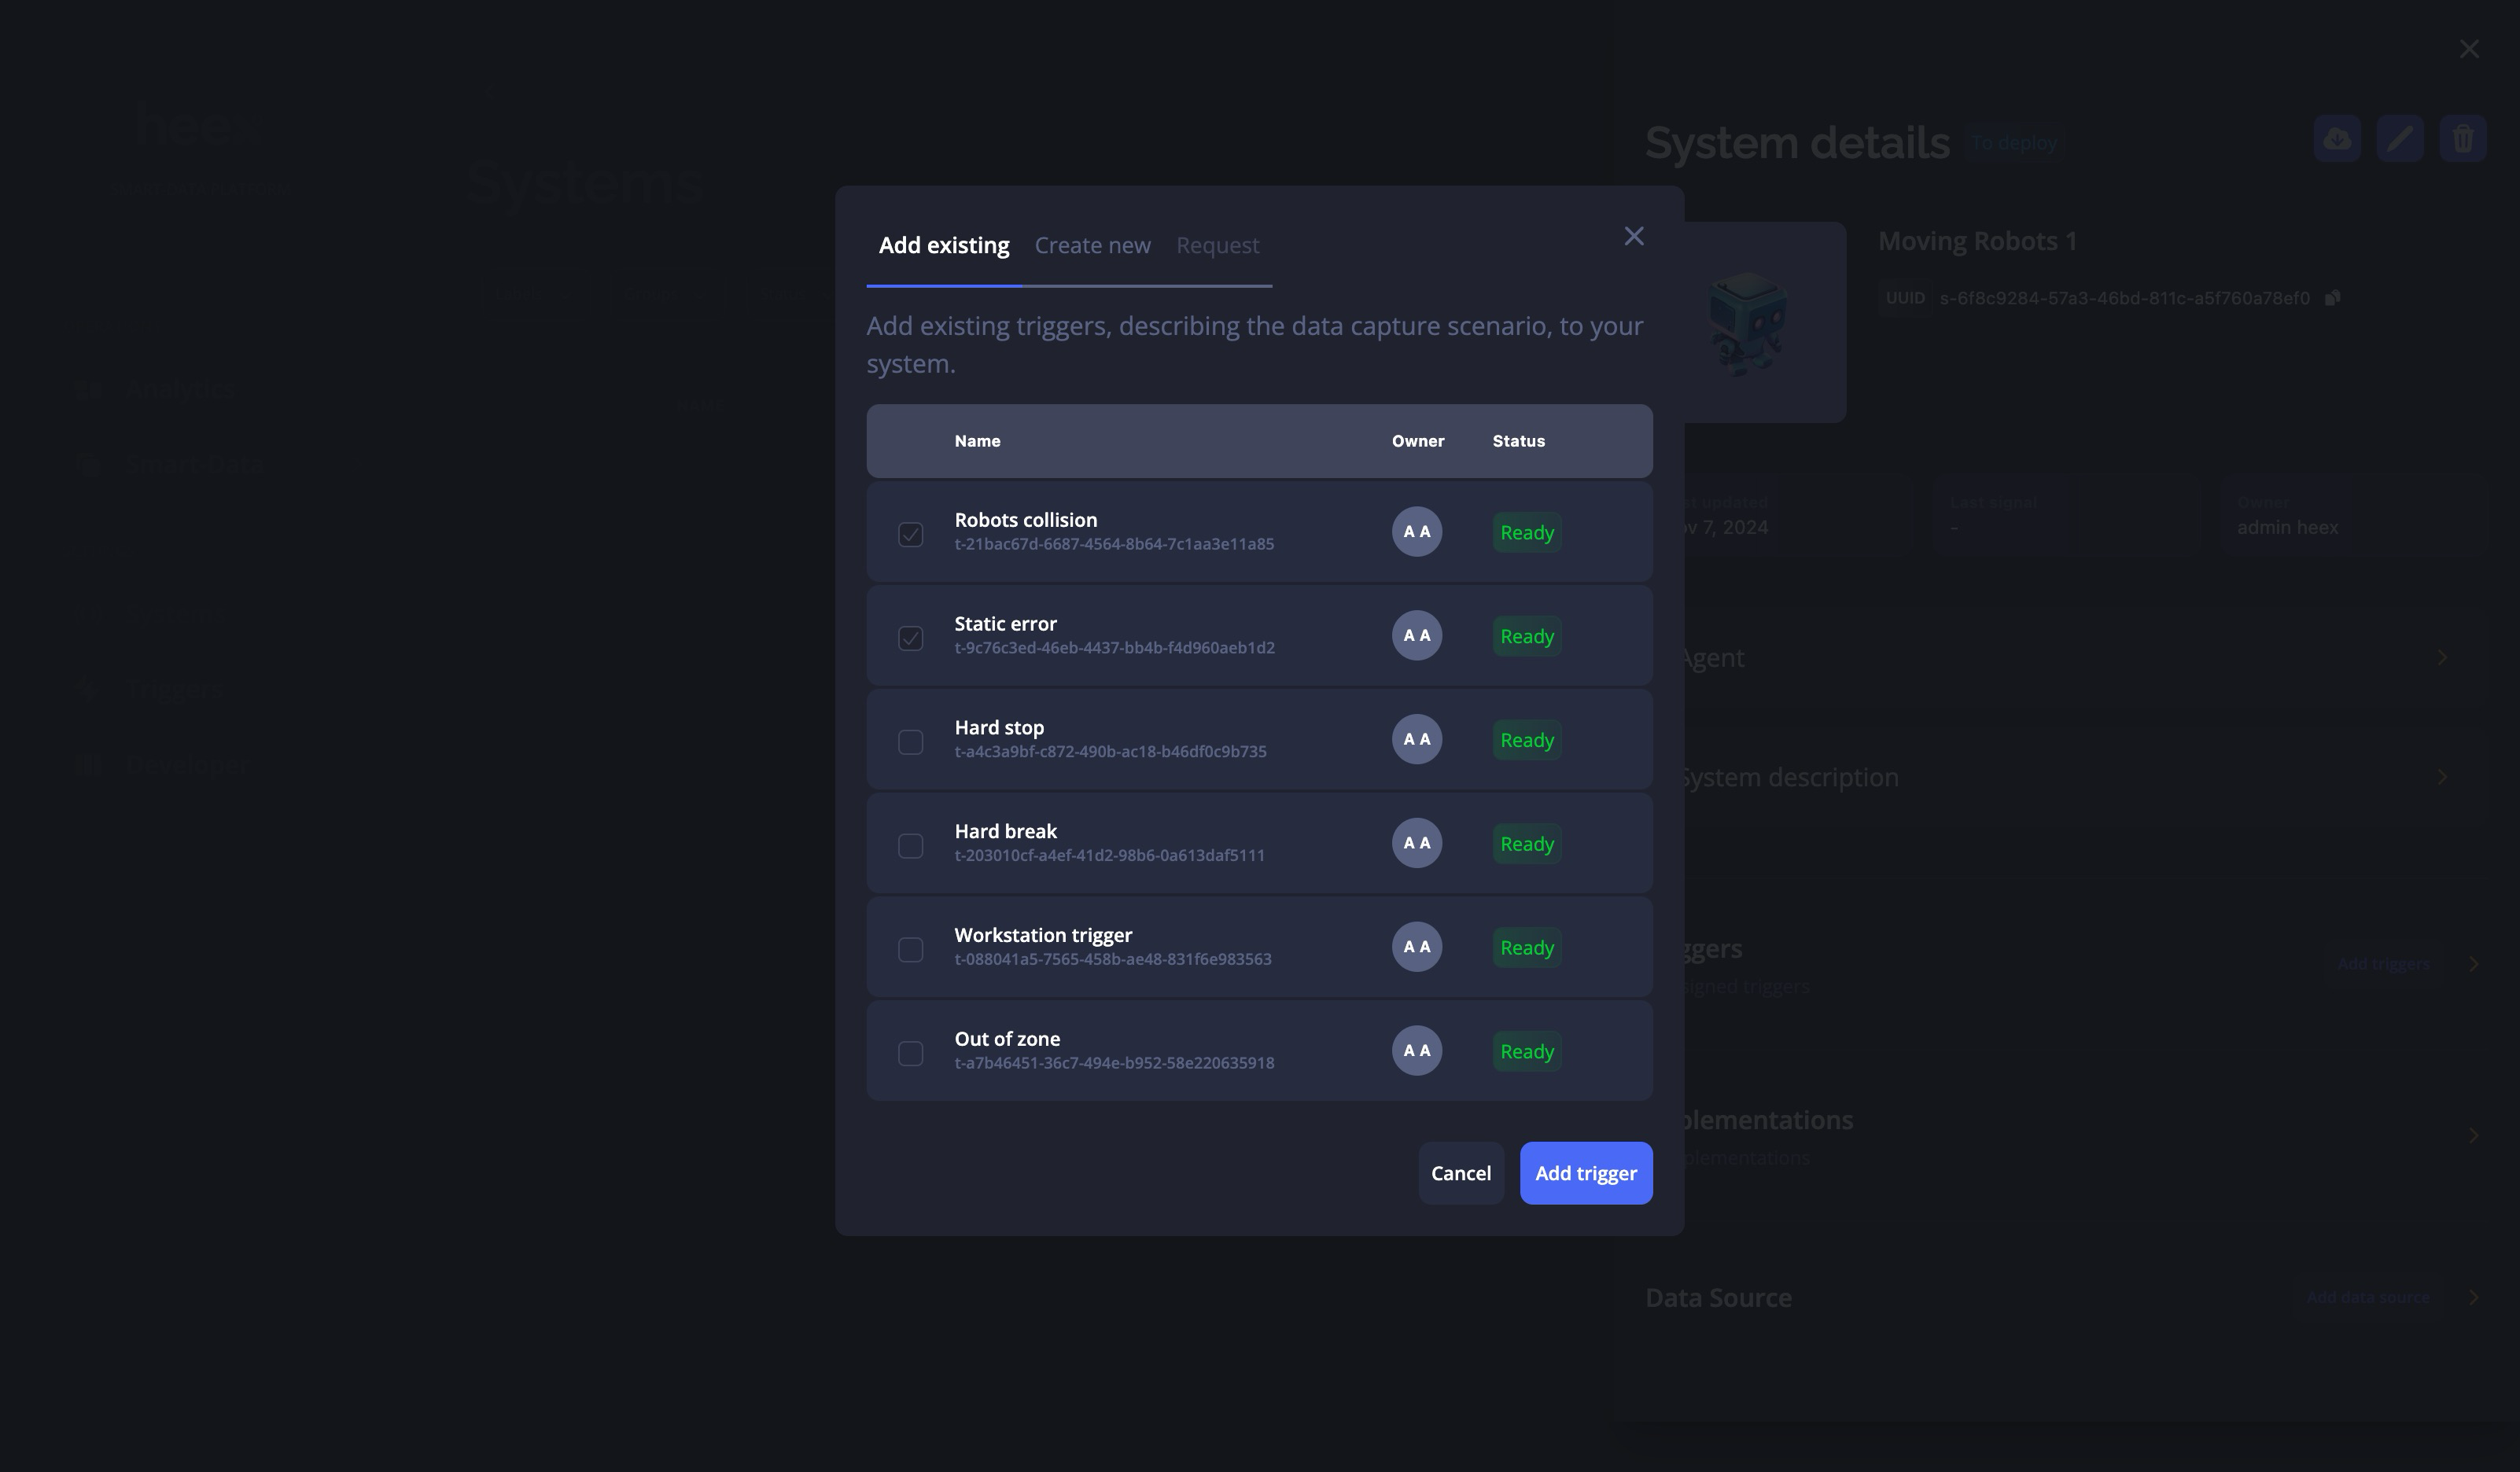
Adding a Trigger to a System
Editing & Updates
You can edit a trigger from the trigger list within a system.Status of Triggers
The status of a trigger may vary depending on where you view it.Trigger List Status
In the trigger list, a trigger will be marked as “Not Ready” if certain fields are missing, such as conditions. Once the trigger can be used in systems, its status changes to “Ready.”System Status
Within a system, each trigger has a status that represents its implementation progress:- Requested: The trigger has been requested and requires completion.
- To Code: Some implementations are missing for the trigger to function correctly.
- To Deploy: All implementations are ready, but some need to be deployed in the system.
- Ready: All implementations have been deployed, and the trigger can start generating data.
Logical Expressions (Formula Mode)
For complex monitoring scenarios, you can combine multiple conditions using logical operators instead of the default AND behavior.Enabling Formula Mode
In the trigger creation/edit form:- Add your monitoring conditions as usual
- Each condition is automatically assigned a letter: A, B, C… (up to Z, then AA, AB…)
- Check the “Formula mode” checkbox after the “If” section
- Enter your logical expression (e.g.,
A OR B,(A AND B) OR C)
When Formula Mode is disabled, your formula is preserved in memory and restored when re-enabled.
Available Logical Operators
| Operator | Description | Example Use Case |
|---|---|---|
AND | All conditions must be true | Temperature high AND pressure low |
OR | At least one condition must be true | Battery critical OR temperature critical |
NOT | Inverts a condition | Motor stopped (NOT running) |
XOR | Exactly one condition must be true | Sensor inconsistency detection |
NAND | NOT AND - false only when all are true | Failsafe logic |
NOR | NOT OR - true only when all are false | All-clear detection |
XAND | All conditions must have same value | Sensor agreement validation |
How It Works
Each condition is automatically assigned a sequential letter (A, B, C…) displayed before its title in the UI. You then write a formula using these letters.Example: OR Logic
Scenario: Alert when battery is critical OR temperature is critical.Example: Complex Expression
Scenario: Alert for two distinct failure modes.- Robot is moving fast AND obstacle is close, OR
- Emergency stop is activated
Formula Validation
When you click “Next step” or “Save”:- The system validates that all letters in your formula match existing conditions
- Invalid formulas show a red border and an error message
- You cannot proceed until the formula is valid
Condition Operators by Signal Type
| Signal Type | Available Operators |
|---|---|
| Number (speed, temperature, etc.) | GREATER_THAN, LESS_THAN, EQUAL, NOT_EQUAL, GREATER_THAN_OR_EQUAL, LESS_THAN_OR_EQUAL, RANGE |
| Boolean | EQUAL |
| String | EQUAL, NOT_EQUAL, CONTAIN, NOT_CONTAIN |
| Date/Time | AFTER, BEFORE, ON |
| Map/Zone (geofencing) | IN, OUT, ENTER, EXIT |
CLI Configuration
For CLI-based trigger creation, see Trigger CLI for JSON structure details.When Formula Mode is disabled (or no logical expression specified), all conditions are combined with implicit AND logic.