Systems Overview
Systems are the core of our platform, serving as the foundation for everything we do. You’ll need to install Agent on your Systems, assign Triggers to them (link to triggers page), and generate Events (link to events page) and Recordings (link to recordings page) from them.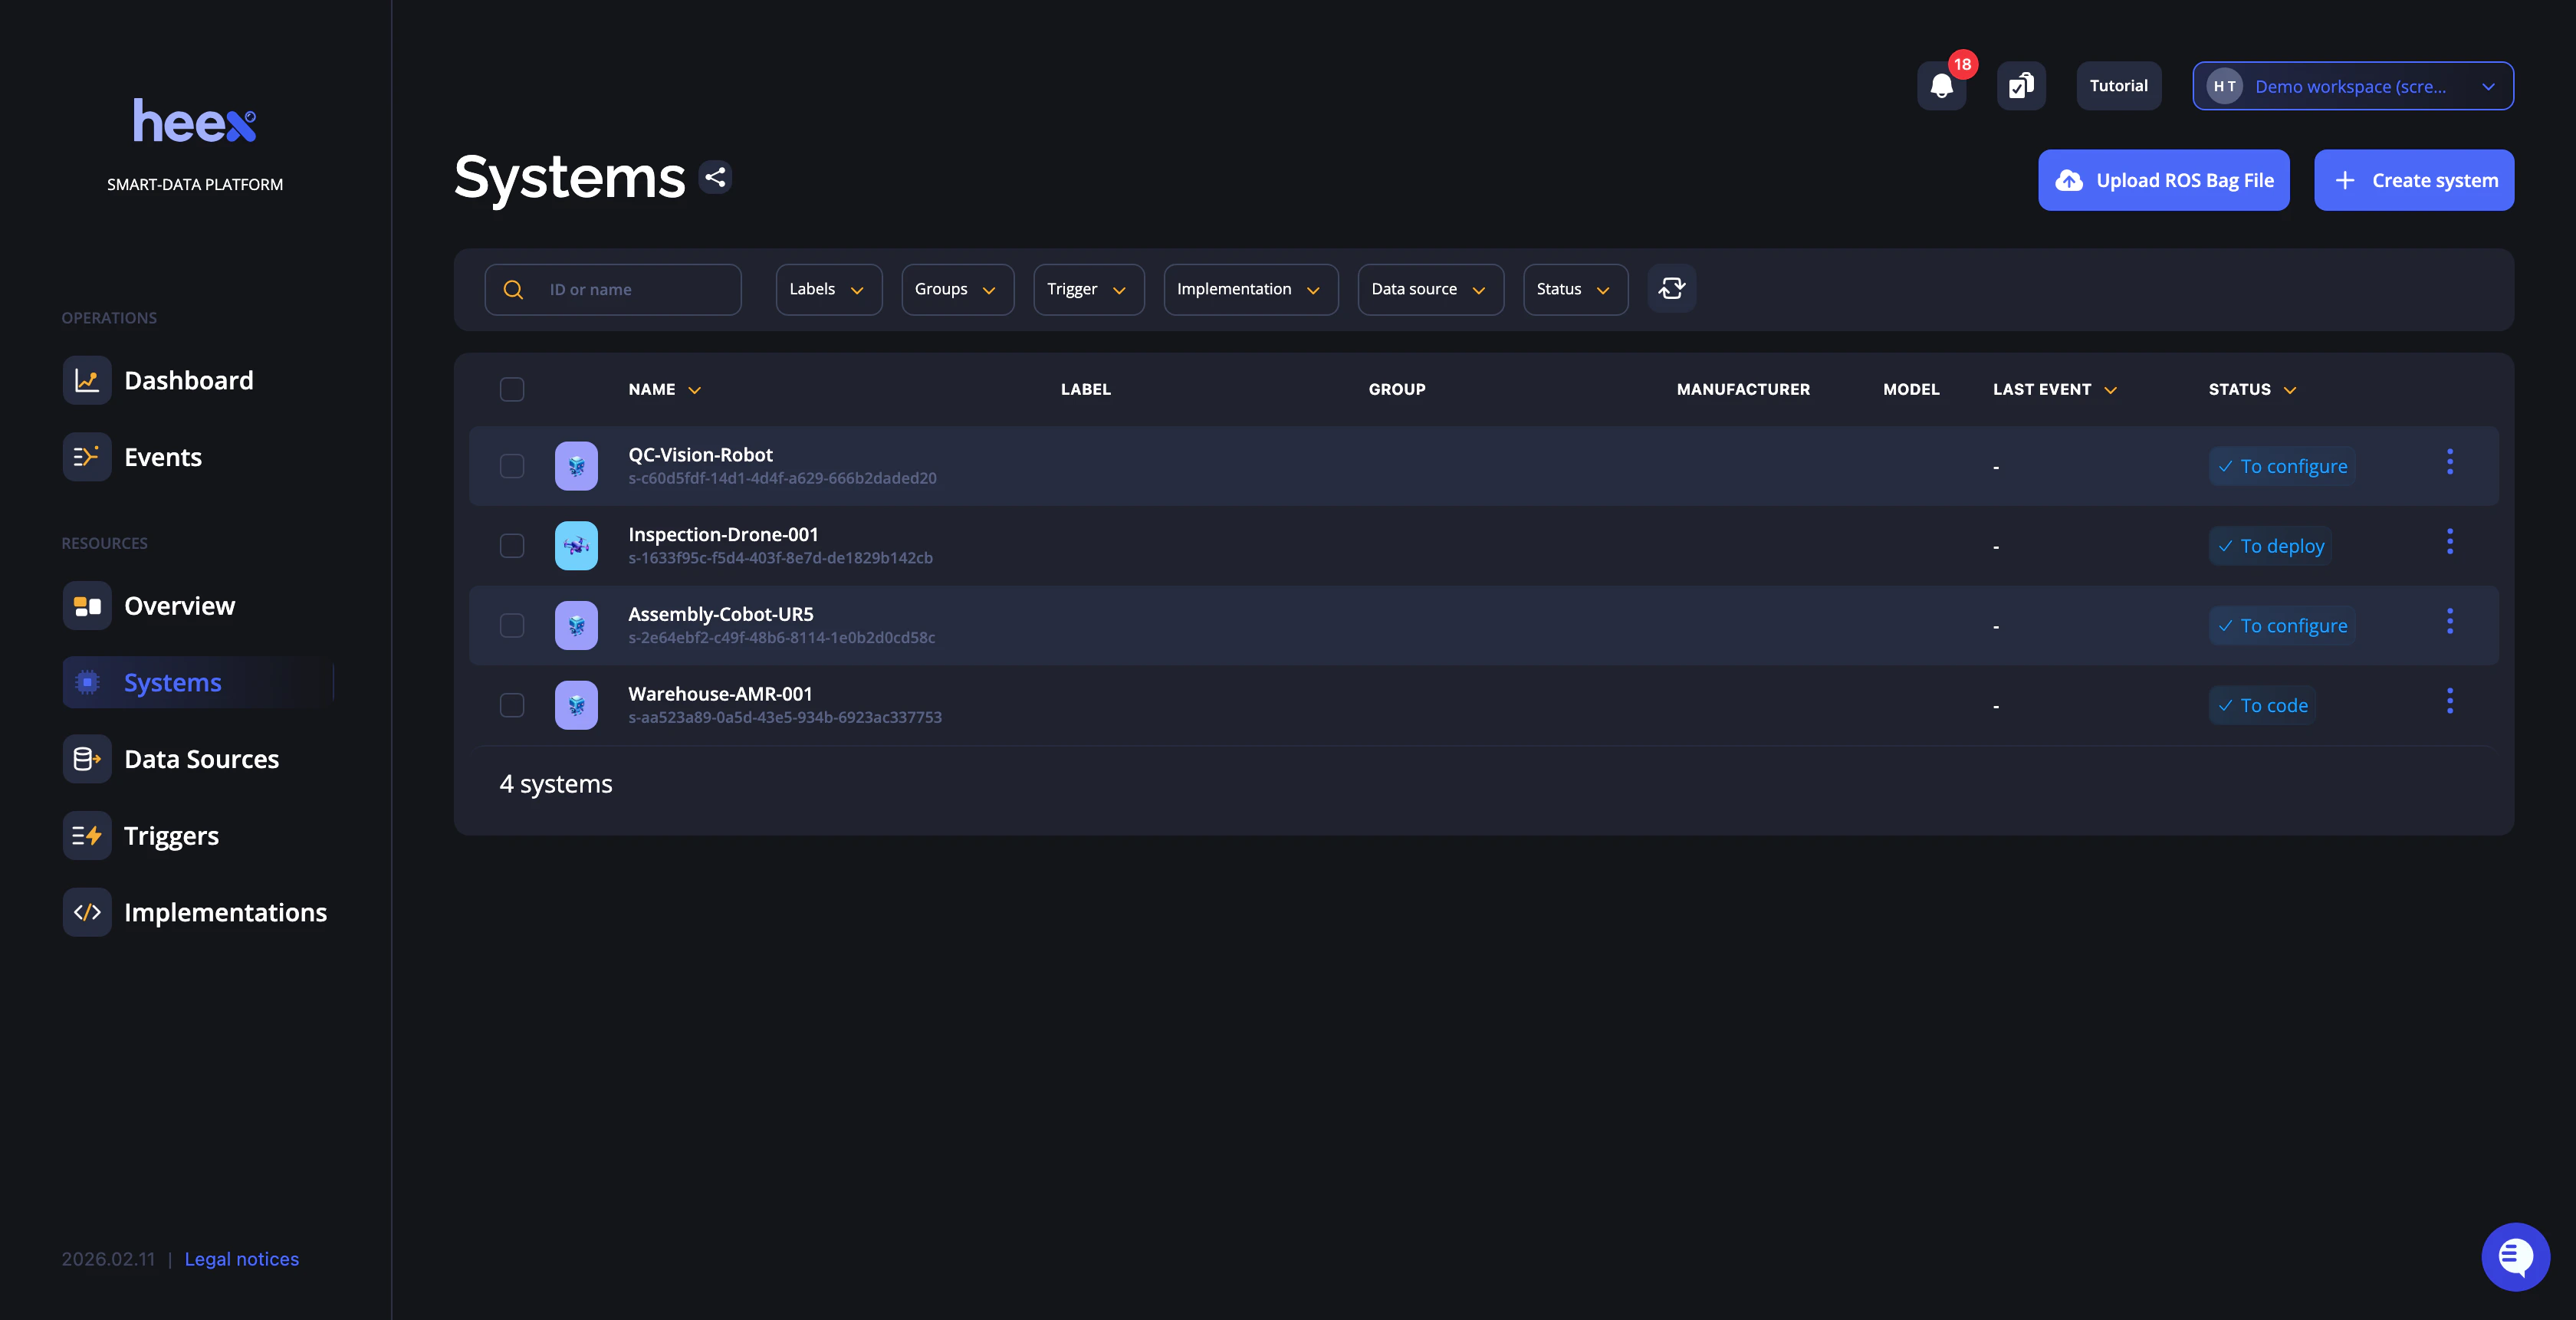
Systems Management
Filtering
On the Systems page, you’ll find a comprehensive list of all your systems, complete with details such as their names, associated labels, and current status. This layout allows you to quickly access the system you need. If you have many systems, we’ve implemented advanced filtering features that enable you to locate what you need in just a few seconds. At the top of the list (see the screenshot above), you’ll see a filter bar. This section contains dropdown menus that let you refine the systems list by Label, Group, and Status. You can select one or multiple values for each filter. For example, you can choose multiple groups to display all systems associated with those groups. It’s important to understand how the filters work, especially in combination. When you select one or more values within the same filter, the platform displays everything that meets at least one of the selected criteria. For instance, if you select the statuses “Ready” and “To Deploy,” you’ll see all systems that are either “Ready” or “To Deploy.” When using two different filters, the system will return only those systems that meet the criteria of both filters. For example, if you select the statuses “Ready” and “To Deploy” along with the group “Group1,” you’ll see all systems from “Group1” that are either “Ready” or “To Deploy.”Creating New Systems
To start generating Smart-Data you need to create systems. To create a new system you have 3 options:- Through the web app (see explanation below)
- Through the Heex Installer
- Through the CLI

- Autonomous Mobility Robots (AMR)
- Sea
- Rail
- Aerial
- Building & Fixed Structures
- Linear Infrastructure
- Open Road (ADAS & AD)
- Cloud & On-Premise Devices
- Dev station
support@heex.io and we’ll happily take your request into consideration.

- Generic informations
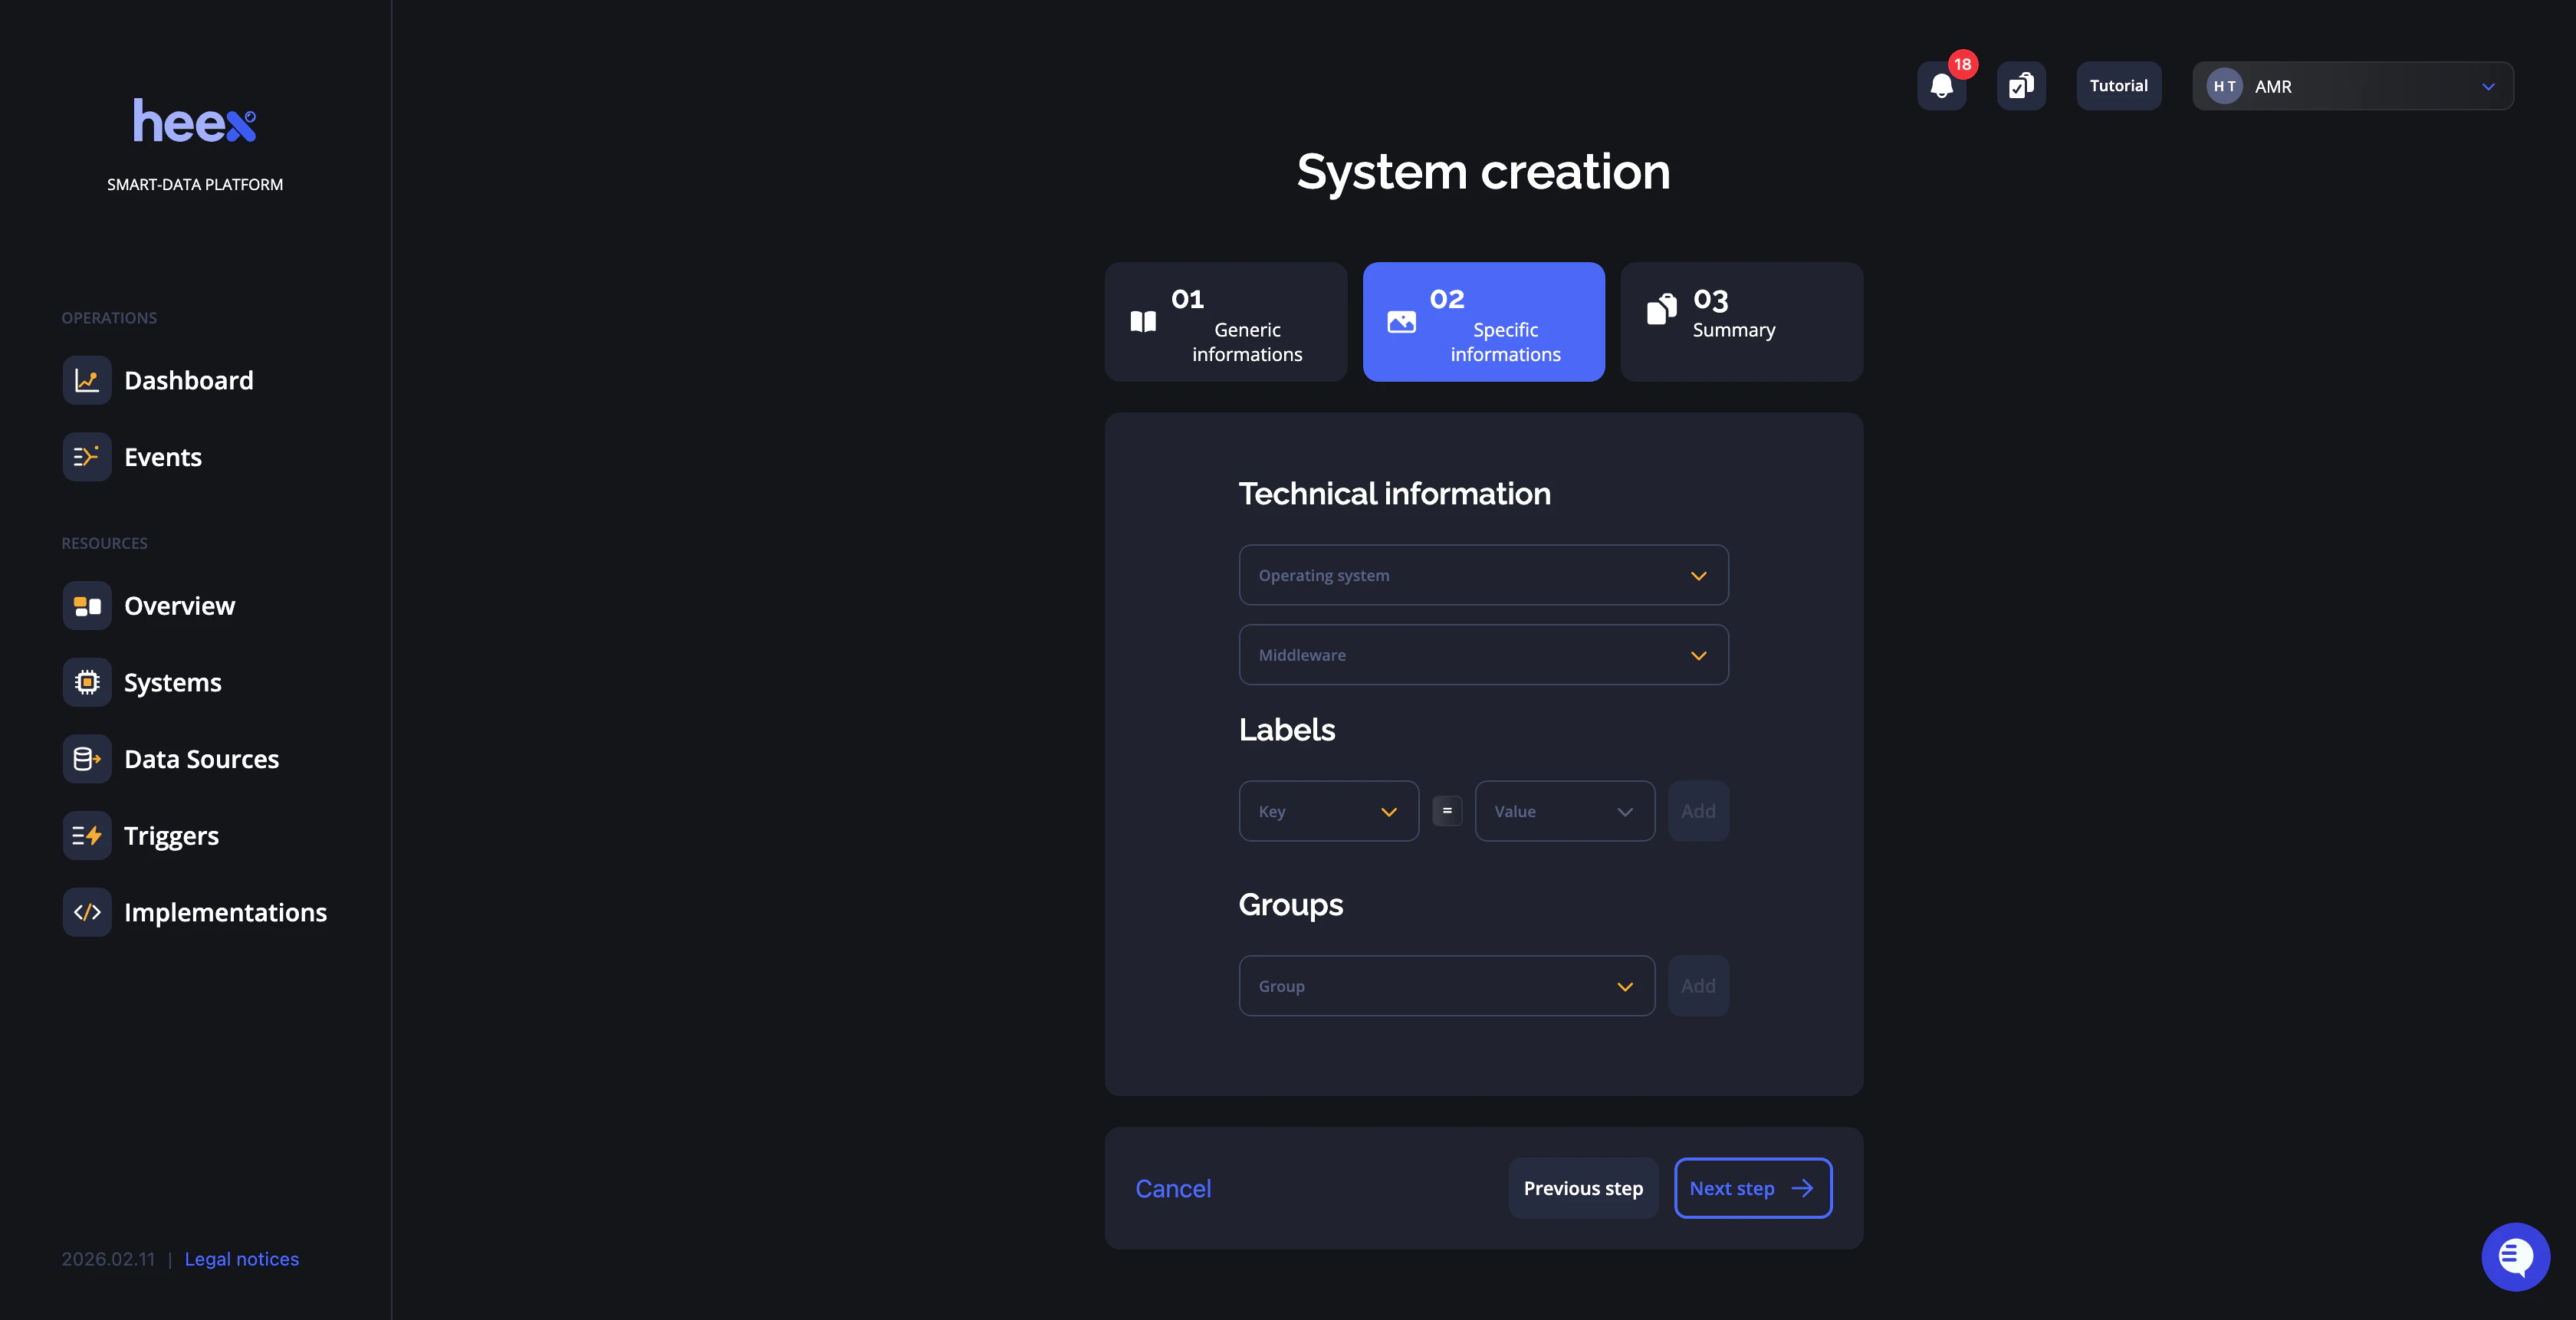
- Specific informations
- Summary
Generic Informations
The first step asks for basic information about your system, including its name, description, and location. Based on the type of system you selected in the previous step, you’ll receive a custom avatar designed specifically for your system by our team.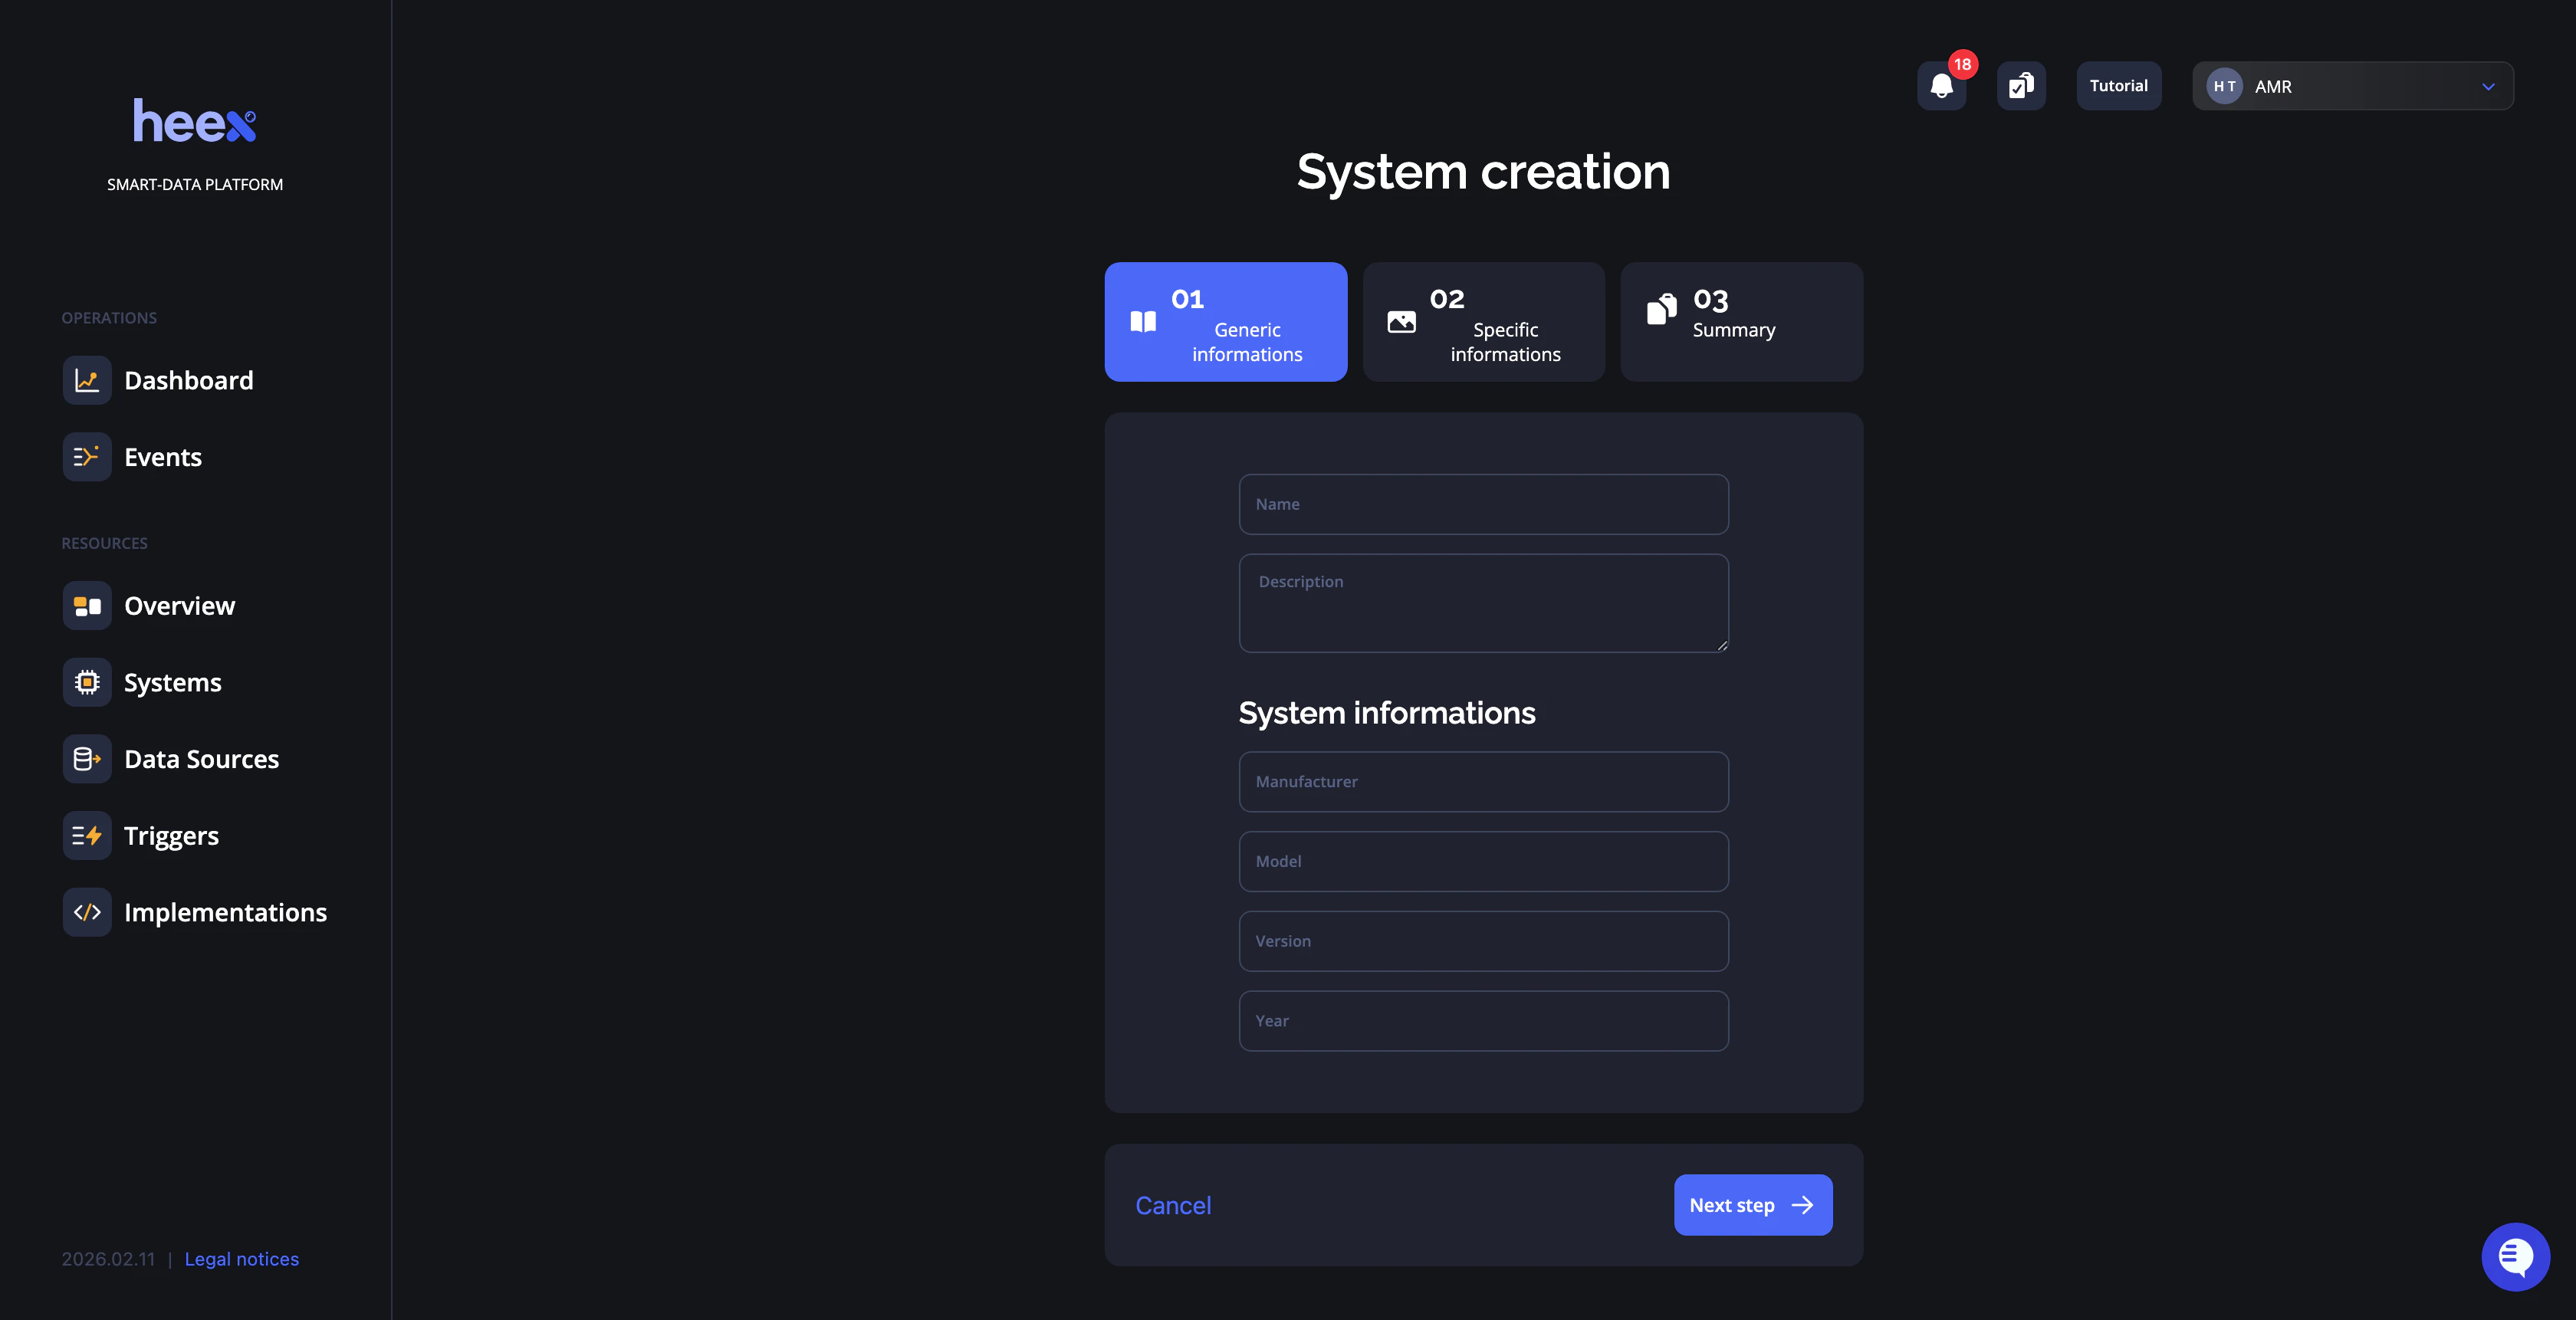
Specific informations
The next step requires detailed information, including the operating system, middleware, labels, and groups (A group is a way to classify systems. Think of it as a Label with a predefined key called Group). Labels help you easily locate your system and add specific information that you want to appear on events generated by your system.- Operating Systems
- Ubuntu 20 (Both x86 and arm version)
- Ubuntu 22 (Both x86 and arm version)
- Ubuntu 24 (Both x86 and arm version)
support@heex.io .
- Middlewares
support@heex.io.
Summary
The last step is a summary of what you selected in Step 1 & 2 before validating your system creation.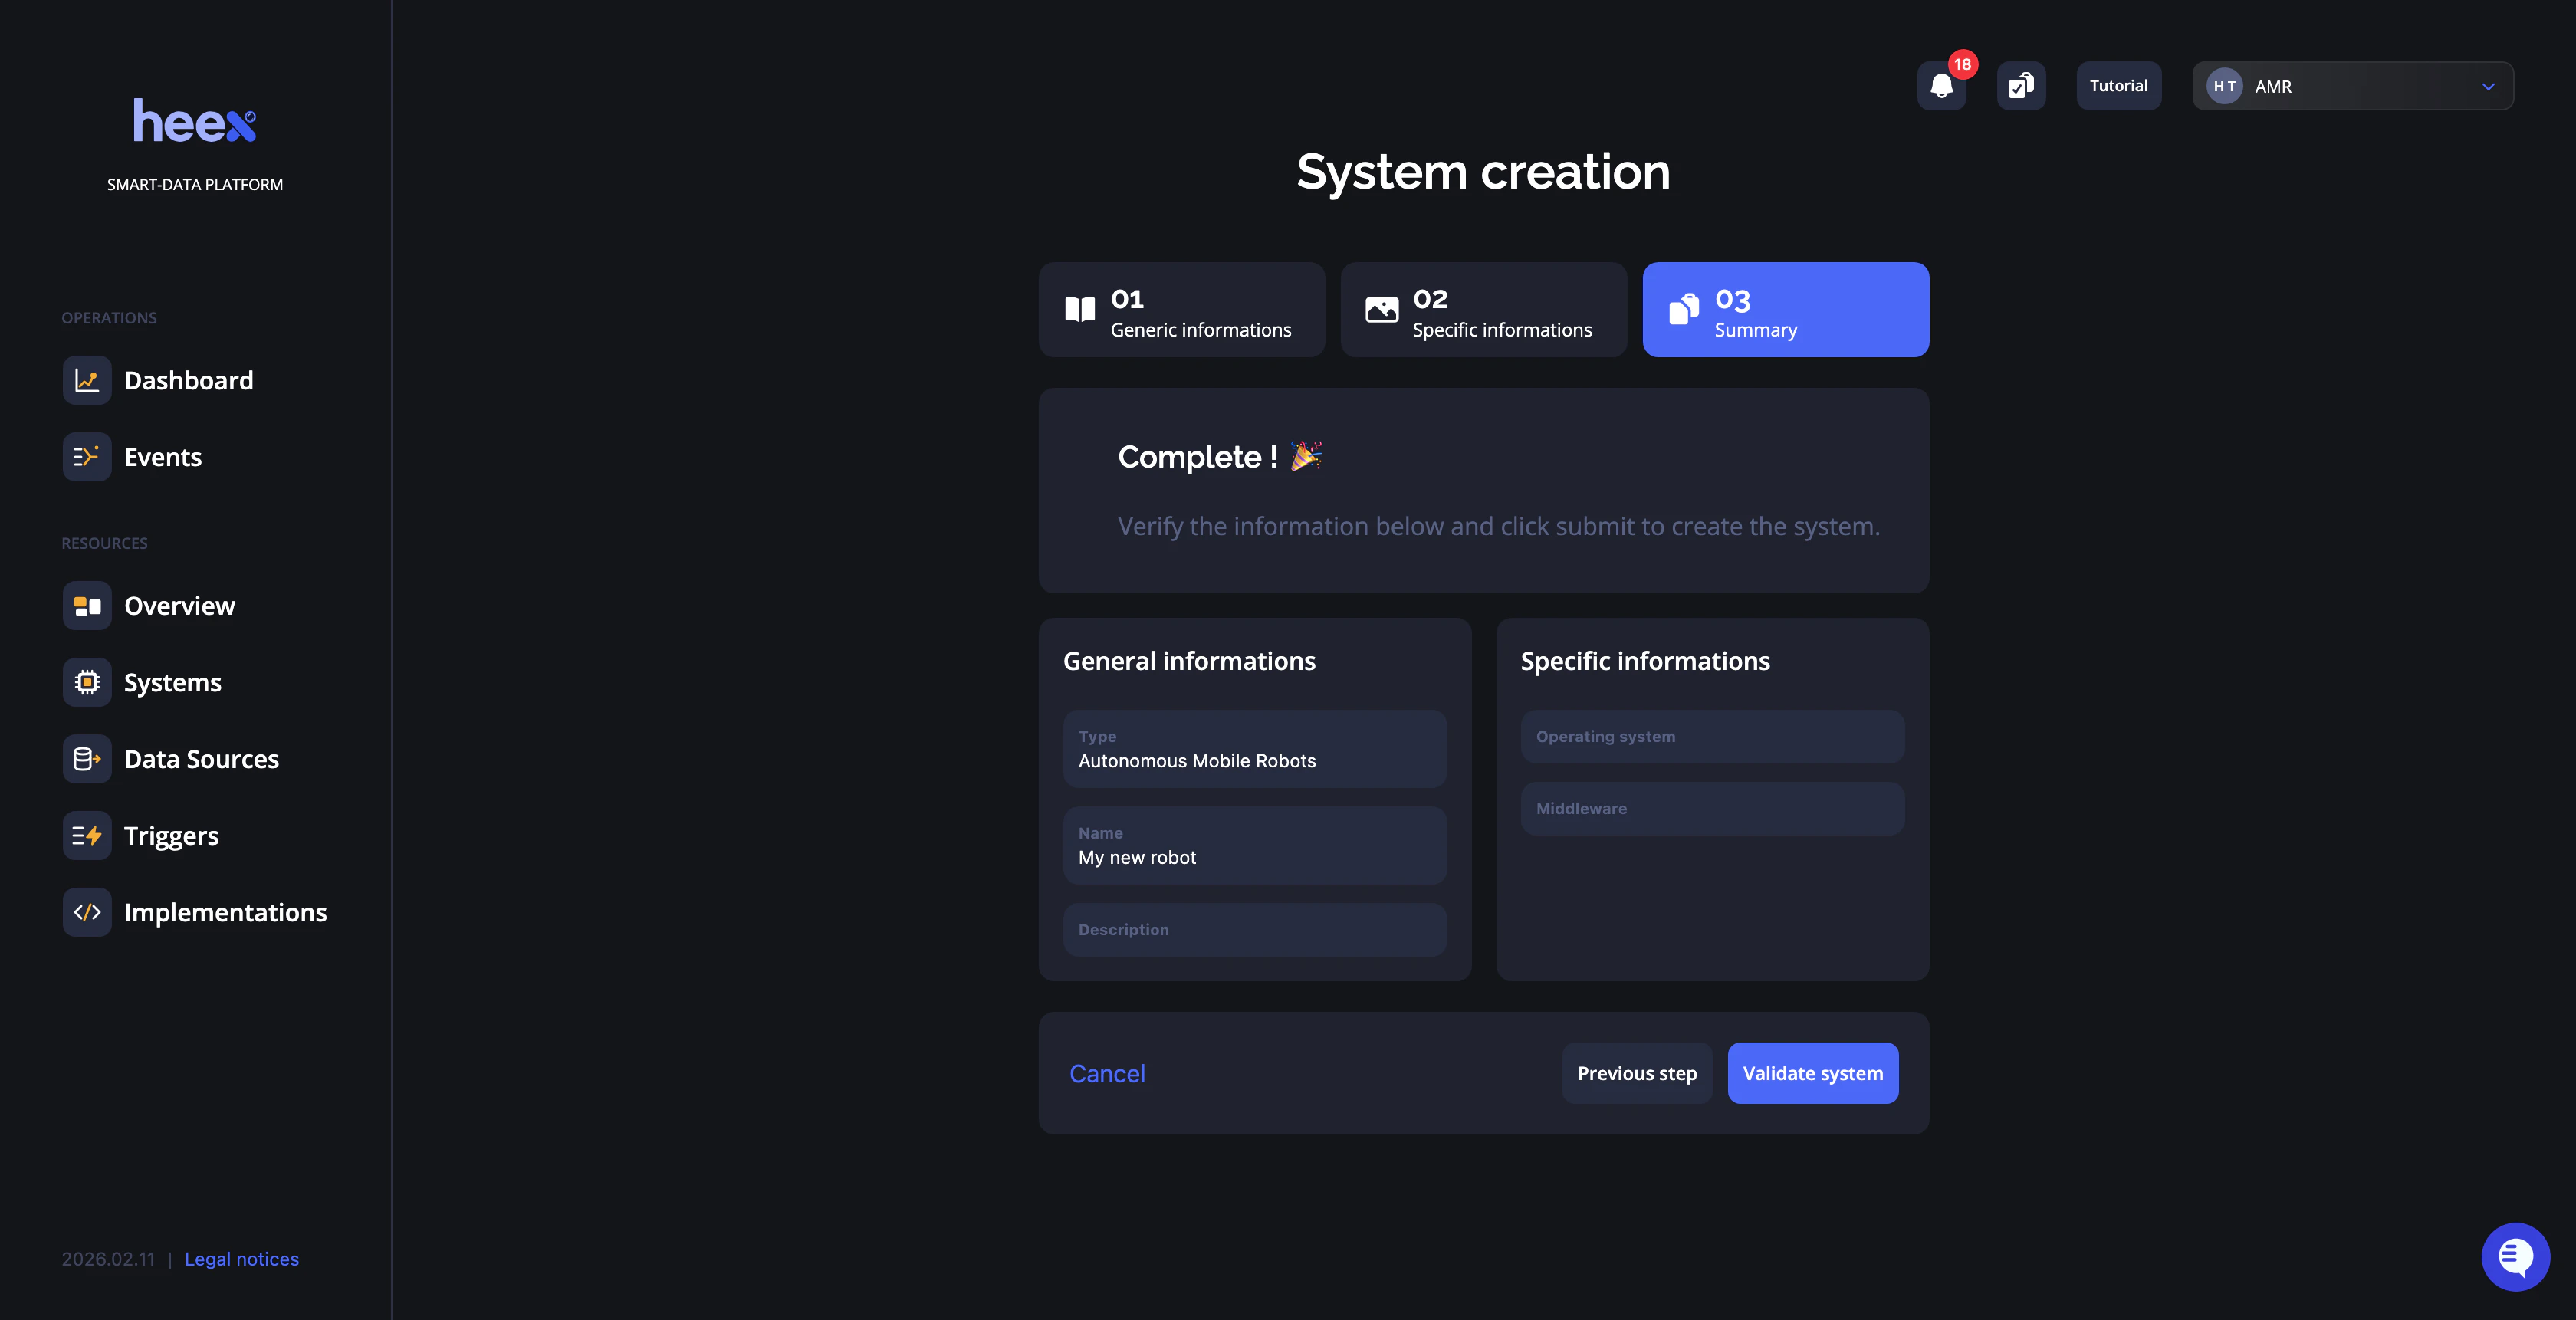
System visualization
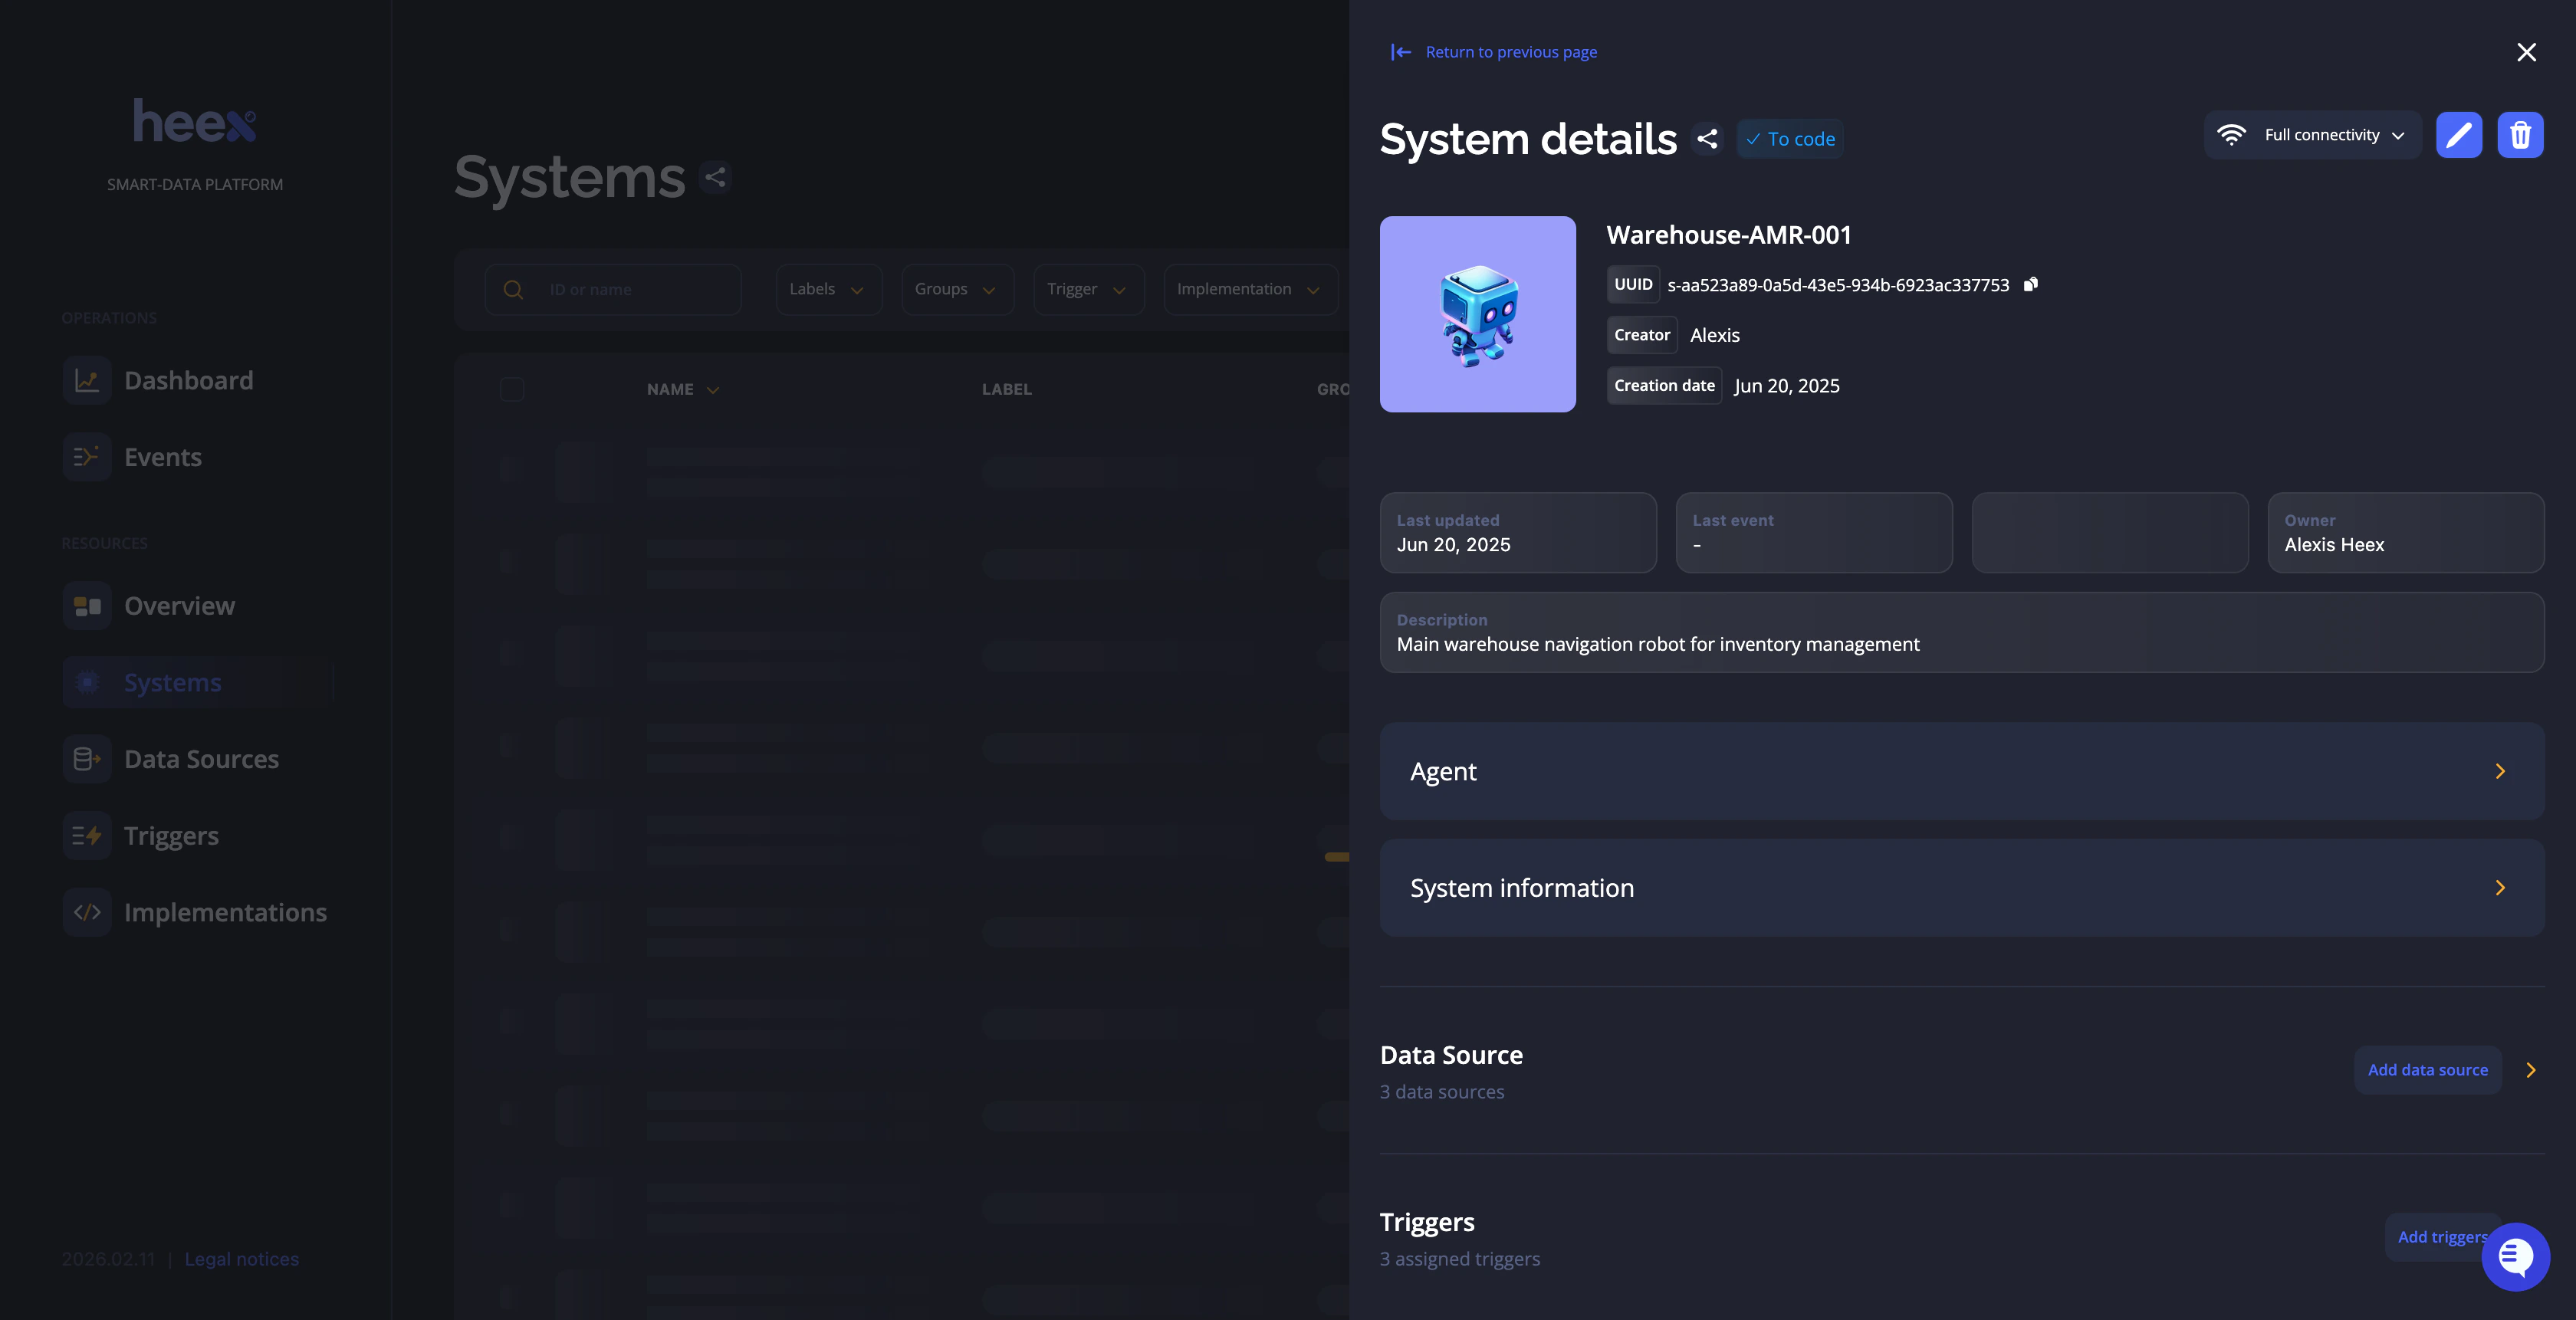
- System Information: This section displays the information you provided during system creation. It also includes action buttons to edit, delete the system, or download its configuration file. (see Editing Configurations)
- Triggers: Here, you can add triggers to the system or view existing triggers. For more information on creating and adding triggers, see this section.
- Implementations: This section lists all signals available in the system, along with their associated implementations. You can assign an implementation to each signal, and a status indicator shows the current state of each signal/implementation pairing.
- Datasources: This section displays datasources with their associated signals and types. You can add datasources directly here, which will update both the datasources table and the implementations table if any new signals are introduced.
Editing Configurations
ThesystemConf.json file is generated by our backend and serves as a blueprint, defining what data to collect and what smart data to generate for the system.
It includes a list of triggers with a Ready status, indicating that they are prepared to generate smart data on this system, along with the conditions they will monitor and record.
Any updates to a resource associated with your system—whether a trigger, Data Source, implementation, or similar—will prompt an update to the systemConf file.
This file, essential for the Agent to initiate events and send recordings to the cloud, is updated over-the-air (OTA) through our architecture, allowing website changes to be directly deployed to the system. This technology enables you to quickly update configurations without technical expertise. Your developers can deploy the required implementations to your systems, creating an unlimited combination of triggers that become instantly available across your systems.